|
ISO
Goals
In this chapter, we will introduce ISO for beginners and explain how to use it effectively for the best possible results.
Content in a nutshell
- In Simplified terms, ISO is expressed as a number that refers to the sensitivity of the camera's sensor to light.
- ISO will affect the brightness and the level of noise present in your photo.
What is ISO?
ISO or film speed is expressed as a number, which is generally doubled as it gets higher. For example 50, 100, 200, 400, 800, 1600, 3200. In analog photography, this number refers to the sensitivity of the film you’re shooting with to light.
Photographic film is made up of millions of light-sensitive silver halide crystals, which we call grain. The lower the film speed, the finer the grain; the higher the film speed, the fatter the grain. Larger silver halide crystals have higher light sensitivity than smaller ones, so a higher ISO number will be more sensitive to light than a lower one.
Although ISO initially defined only film sensitivity, it was later adopted by digital camera manufacturers with the purpose of maintaining similar brightness levels as film.
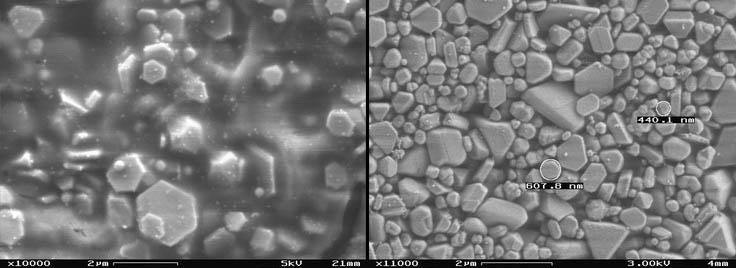
Silver halide particles embedded in gelatin (left). Particles removed from gelatin for a better view (right) [photo courtesy of www2.optics.rochester.edu].
But how would this translate to when working with a digital camera? Isn’t ISO something that can be changed? A digital camera's sensor has only one sensitivity, which we call the base sensitivity, usually 64, 100, or 200. You don't change the sensitivity of the sensor when you change the ISO. Instead, you amplify the output of the sensor much like turning up the volume on a radio. The strength of the signal coming from the radio station is not changed, you are simply amplifying the output.
Likewise, noise in a photo is much like the floor noise in the audio, which is of course amplified along with the signal. Therefore, it becomes a SIGNAL-to-NOISE ratio equation. Keep the ratio high and the noise will be low. That is why if we shoot at the base sensitivity of a camera, we will get the sharpest and least noisy pictures.
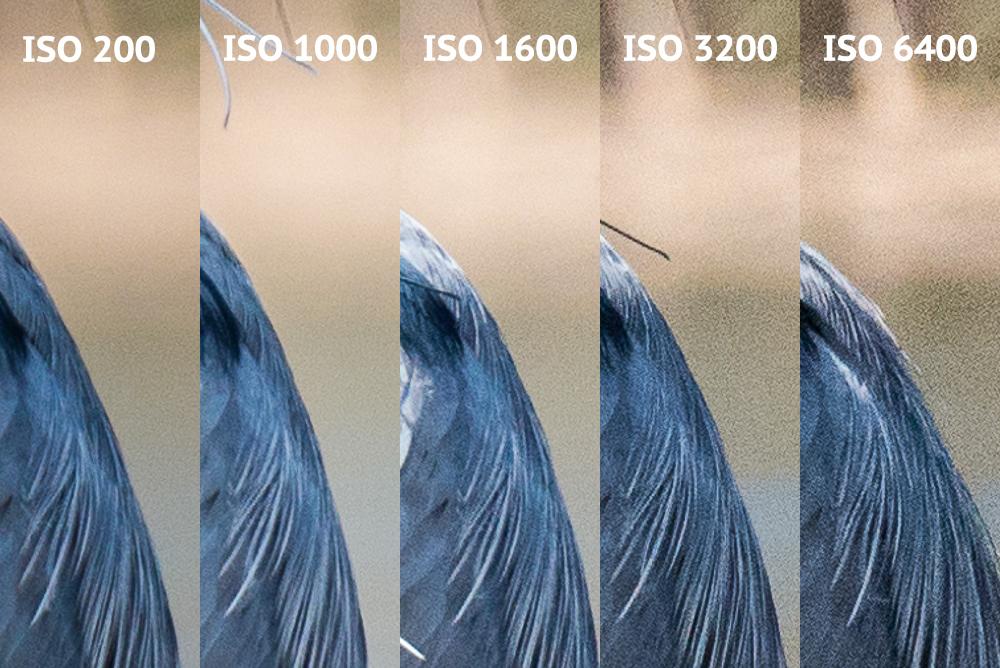
The grain in the photo increases with the ISO value [original photo courtesy of Dave Morrison].
ISO and Exposure
Remember ISO value and exposure value are not the same things. While ISO values control the light sensitivity, it doesn't determine how much light is captured by the camera. That task belongs to the combined settings of your camera's shutter speed and aperture.
The job of ISO value is merely to amplify the light signal that the camera receives. In the process, it can produce a similar effect as opening the aperture or using a slow shutter speed.
ISO values do not influence exposure directly. The exposure value is the product of aperture and shutter speed, which together, capture a certain amount of light in a given lighting situation. The base ISO number does influence the final image quality by controlling how bright or dark it will be, using the exposure value as a base. In the images below we can see the progression of how the light signal is amplified by only changing the ISO setting and keeping aperture and shutter speed constant.

[original photo courtesy of Ramesh Yahathugoda on PhotoBlog].
Minimizing Noise in Your Photos
Based on intuition you would probably assume that the best option is to always use the base ISO of the camera to achieve maximum image quality. And while that might be true in a lot of circumstances, at times you will have no other choice but to increase your ISO to get the desired effect in your photos.
You should use base ISO when the light conditions permit it. Don't try to force a low ISO in a dark environment, or your photos might come out too dark (for a high depth of field) or blurry (if you're photographing fast-moving subjects). As a general guide, here are some steps you can follow to try and maximize the quality of your photos:
- Select the aperture setting that will provide you with your desired depth of field.
- Set your ISO to its base value, and adjust your shutter speed to provide a proper exposure.
- If your subject is blurry, progressively raise your ISO and use a faster shutter speed until motion blur disappears. Alternatively, you can use a tripod if motion blur isn't an issue.
- If your ISO is getting too high and you still have the ability to use a wider aperture, open it up until the ISO gets to a more manageable level, even if it means sacrificing some of your desired depth of field.
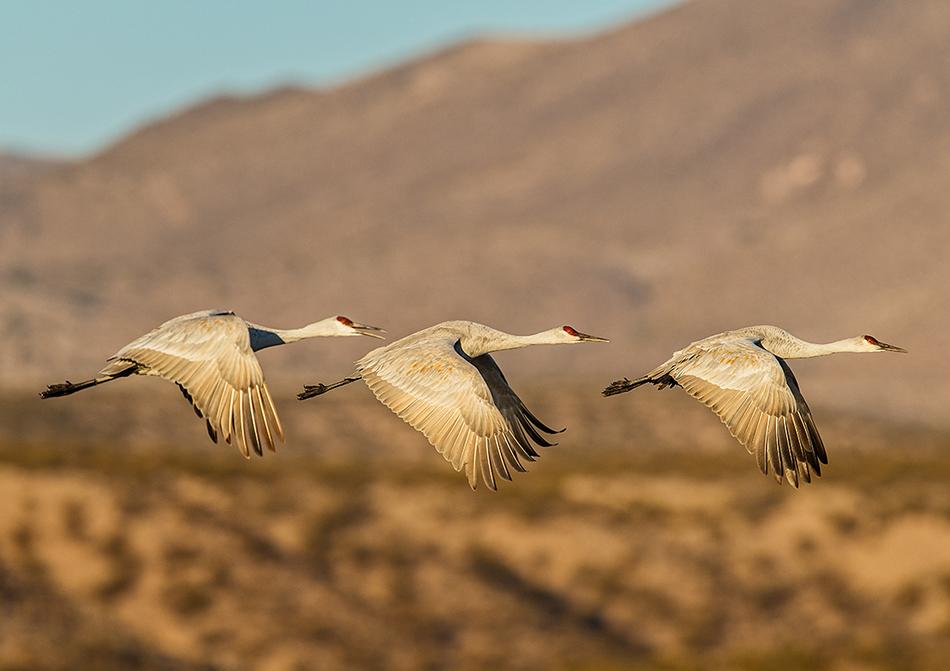
While photographing fast moving subjects in a lower light setting, you might want to use a higher ISO [original photo courtesy of Tom Bol].
What ISO to Use and When
Listed below are some basic recommendations for which ISO to pick in various lighting conditions:
- ISO 50 (or lower): Bright Sunlight (the beach in the afternoon, for example), studio lights
- ISO 100: Bright Sunlight, bright overcast, studio lights
- ISO 200: Sunlight, overcast, some shade, studio lights
- ISO 400: Outdoor (Sunlight/overcast), indoor (during the day or very well lit)
- ISO 800: Outdoor (very overcast), dusk, interiors, motion / high speed
- ISO 1600: Night, interiors (day or night), motion / high speed
- ISO 3200: Night, interiors, motion / high speed
How to Set ISO on Your Camera?
Changing the ISO value varies from camera to camera. Here are some common ways how to do it:
- As a starting point, enter a mode that lets you select the ISO manually. Get out of Auto mode, and go to Manual, Shutter Priority, Aperture Priority, or Program.
- For entry-level DSLRs and mirrorless cameras, you probably need to open a menu (possibly the “quick menu”) and find the section for ISO. Select the value you want, or set it to Auto.
- For higher-end cameras, there may be a dedicated “ISO” button on the camera. Press it while spinning one of the wheels to change your ISO setting. If you don’t see a button labeled “ISO”, it is still possible that your camera will let you program one to perform this task.
- Other cameras may have a dedicated wheel that already has various ISO settings marked. This makes things even easier.
You can always consult your camera manual if you are still having issues. It is worth being very familiar with how to change your ISO setting quickly, as it is something that is changed quickly and often in photography, especially in low light conditions.