|
Creating a Printable Model
Goals
In this chapter, we will go through the possible ways of building geometry that is 3D printable and its restrictions.
Content in a nutshell
Designing in CAD software
Most of the projects that artists, designers, and architects develop will fall into this category. For 3D printing, it is possible to use any of the CAD software available. Whether it is Rhino 3D, Archicad, SolidWorks, Fusion 360, or even Maya.
Despite the great freedom that this means, it is important to remember that anything can be modeled on 3D software, but not everything can be 3D printed. What does this mean? It means that it is important to consider how your design is modeled, and how will it be printed.
In the following steps, we will review the key characteristics that your model should have before exporting it and how to achieve them.
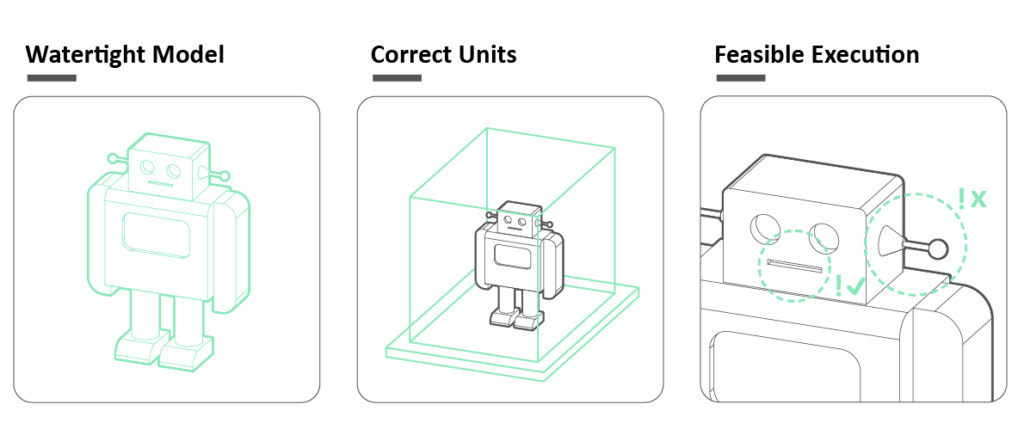
Design should be watertight
Your model needs to have a volume. The technical name for this is manifold. This means the surface on your 3D design should be connected at all edges. In rhino, make sure that your model reads as a closed polysurface in the properties menu or find the potential open geometry with the command SelOpenPolysurf or SelBad. Non-manifold 3D objects cannot be printed, or they usually fail by missing parts of their geometry when exporting. This is especially frequent in 3D animation files.
Keep track of units
When exported, most of the mesh files will be formatted to millimeters (mm). If you are doing a scale model, it is important to scale your model in your CAD modeling program before exporting. Keep in mind the maximum dimensions of the printing bed and the resolution of the printer you are using.
Design for reality
Keep in mind that 3D printers cannot deposit material in thin air.
Depending on the technology you will use for printing, support structures can be added automatically later on when converting your model to code. Nevertheless, it is good practice to avoid using support structures when possible, because it will affect the quality of the surface and it will require some post-processing work. This also means that your model should have a minimum thickness of between 1 and 2mm. Less than that and the material isn’t deposited properly which might lead to deformations and tears in the final printed model.
Depending on the printer, very detailed parts of the model might not translate well in printed form. Always keep track of the scale in which your model will be printed and the level of detail that is appropriate for the medium.
If you wish to learn more about how to design for each specific technology,
please review the following articles:
3D Hubs - How to design for FDM printing
3D Hubs - How to design for SLA printing