|
Drawing 3D: Axonometry
Goals
Although it is possible to directly output axonometric drawing from a 3D model, we still need to know the basic knowledge of its principles. The aim of this page is to introduce the basic types and drawing steps of axonometric drawing.
Content in a nutshell
- Axonometric is an orthogonal projection used to create a projection of an object on a certain plane. Unlike top, left/right side, or front/back view, the object rotates around its one or more axes to display multiple sides, presenting a three-dimensional effect. Axonometry is parallel projection.
- To draw the 30-30 degree axonometry, the lengths of the lines on the x, y, and z axis are all drawn to be equal to the actual length. But in reality, axno_x = 0.82 orginal_x; axno_y = 0.82 orginal_y; axno_z = 0.82 orginal_z.
- To draw the 45-45 degree axonometry, the lengths of the lines on the x, y, and z axis are all drawn to be equal to the actual length. But in reality, axno_x = 0.82 orginal_x; axno_y = 0.82 orginal_y; axno_z = 0.5 orginal_z.
- To draw the 30-60 degree axonometry, the lengths of the lines on the x, y, and z axis are all drawn to be equal to the actual length. But in reality, axno_x = orginal_x; axno_y = orginal_y; axno_z = 0.5 orginal_z.
Types of axonometry
The axonometric drawing shows the shape of the object on the three coordinate planes. 2D drawing method is used to express the object in 3D. Distinct from perspective, as a parallel projection, there is no distortion along the axis, thus it expresses the shape of the object and details more accurately.
There are many different ways of drawing axonometric drawing, which can express very detailed content as well as the overall relationship. But the basic drawing principles are the same, the further content and style are quite personal and need enough time for elaboration.

Exploded Axonometric that shows a landscape design. Source: archdaily:DARP, mención honrosa en concurso de ideas del Parque Juan Amarillo en Bogotá | Plataforma Arquitectura.
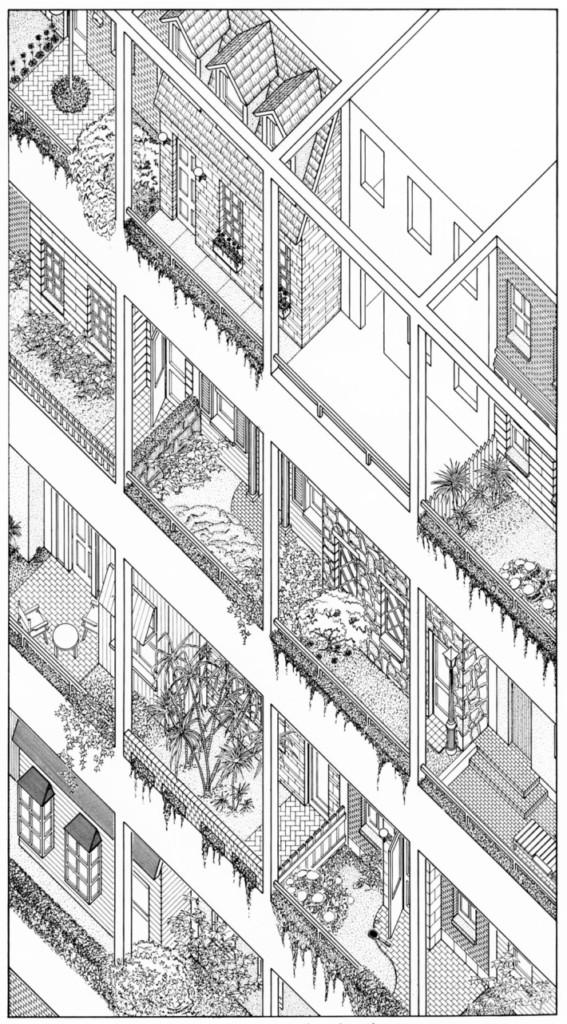
This Axonometric shows the detail of a specific part of the building. Picture: James Wines, High-rise of Homes.
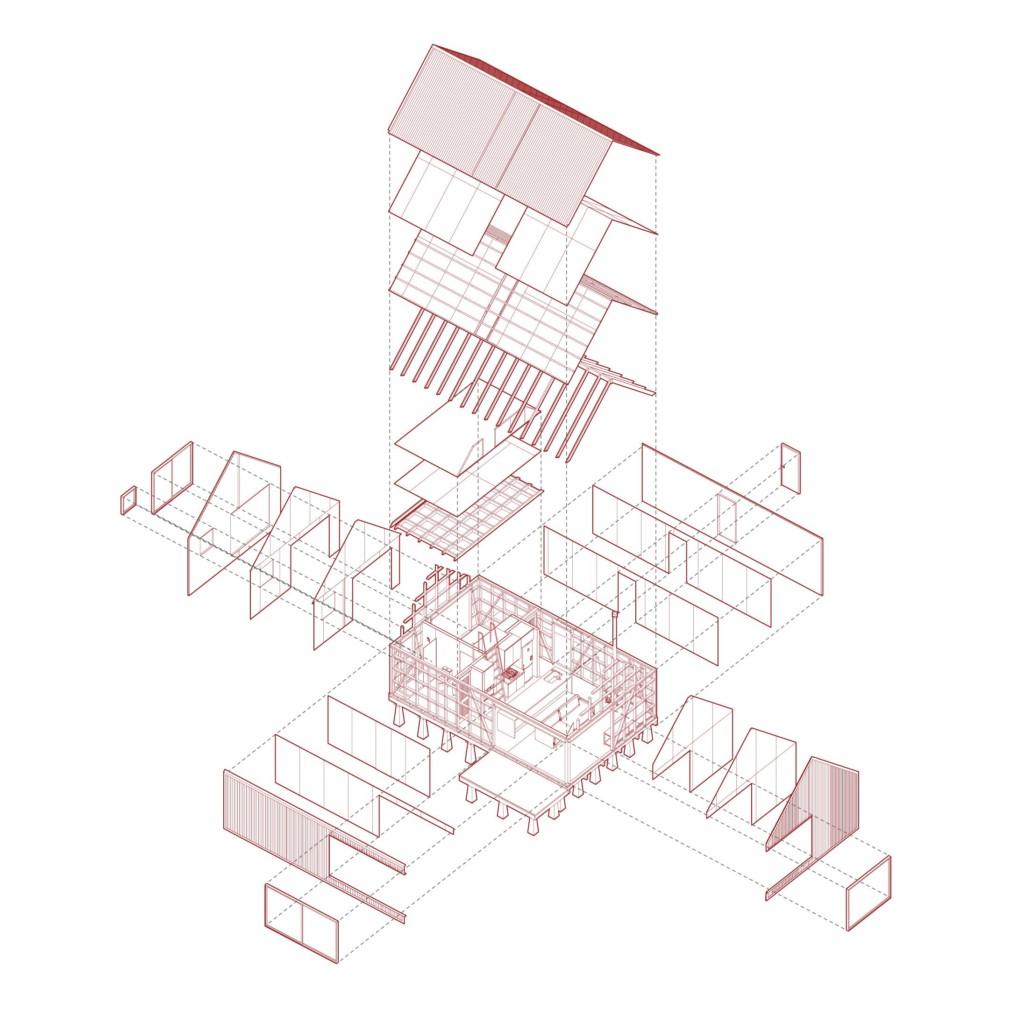
An exploded view of a building. Shows the component of the building. Picture: uploaded by Ignacio Pizarro in Pinterest.

Use the axonometric technique to draw the building detail. Picture: Stephane De Weck.
To draw a building axonometry, choose first the type of projection you want to use.
Isometric (30-30 degree) uses the same scale for every axis, resulting in a non-distorted image. Also, it is the most recognizable angle for human eyes.
Oblique projection(45-45 degree) is a type of oblique projection where distances and angles are preserved in plan and heights are extruded in a vertical direction. Since the x-axis and y-axis are perpendicular to each other, they can be drawn by directly adding height lines to a plane that rotated 45 degrees. It is easy to draw when ignoring the scaling factors.
30-60 degree axonometric also keeps the x-axis and y-axis perpendicularly to each other. In addition, it maintains the origin length on the x-axis and y-axis, when taking the scaling factor into account, it is easy to draw.
Construction of a drawing in axonometric projection proceeds in the same way as in traditional drafting on paper. The final drawing is in fact two-dimensional, with an illusion of three-dimensionality coming from projection qualities of the drawing as well as from choice of shading of surfaces.
The choice of which axonometric to draw depends on the view to be observed. Sometimes it is much faster to construct an axonometric drawing directly in 2D than modeling it first in 3D.
The most common angle of architectural axonometry is 45-45 degree and 30- 60 degree.
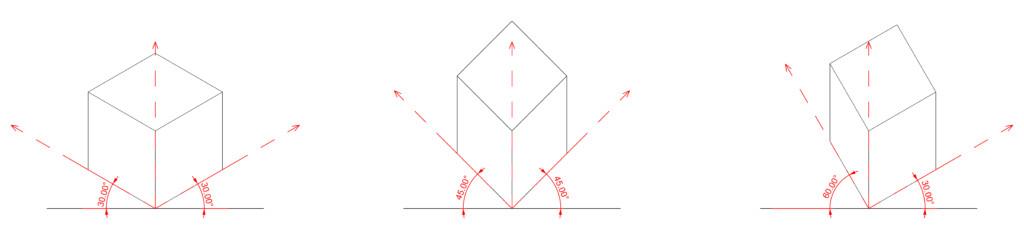
Left: isometric(30-30 degree); Middle: military(45-45 degree); Right: 30-60 degree. Picture: Fanyi Jin
30-30 Degree (Isometric projection)
1. Draw a horizontal line, then draw the axis of 30-30 degree axonometry.
2. Draw the plan along the axis, axonometry_x = original_x; axonometry_y = orginal_y.
3. You can draw circles to help with the measurement.
4. Draw the height line on z-direction, axonometry_z = original_z.
5. Draw the surfaces.
6. Analyse the occlusion between faces and make proper deletions.
7. Add details such as window frames.
The axonometric can be drawn as exploded view to show more details.
The workflow is shown in the pictures below.
Picture: Fanyi Jin
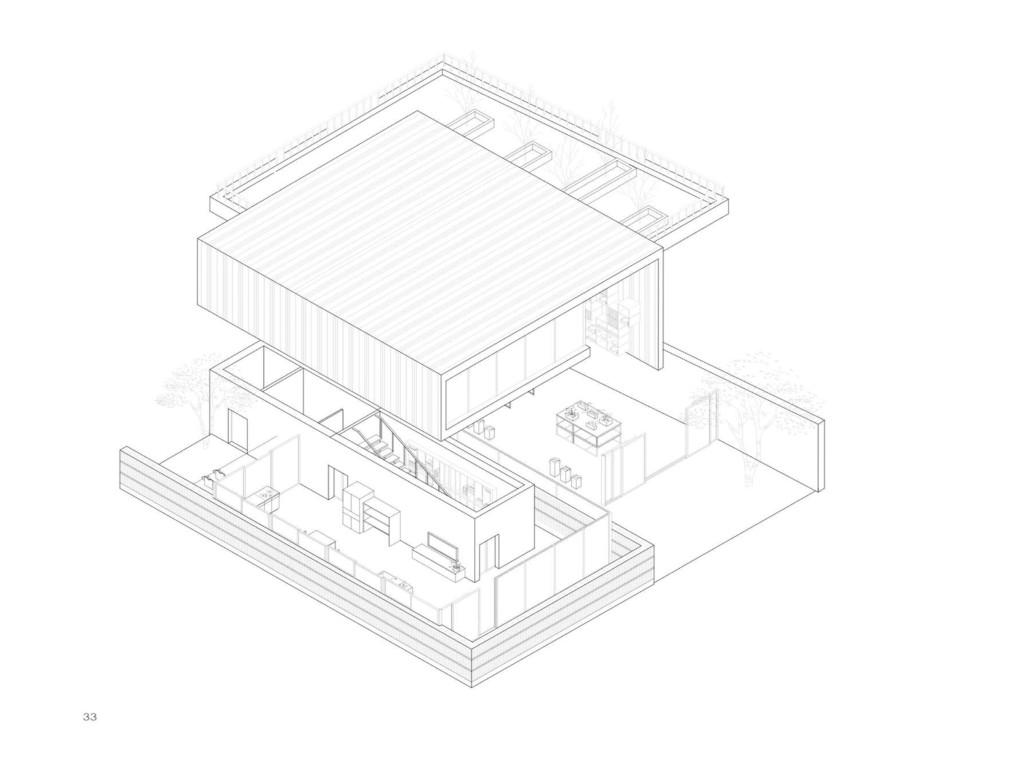
Vertical explode shows more details of the first floor and deconstructs the basic shape of the building. Picture: Fanyi Jin
45-45 Degree (military projection)
1. Draw a horizontal line, then draw the axis of 45-45 degree axonometry.
2. Draw the plan on the axis, axonometry_x = original_x; axonometry_y = orginal_y. You can rotate the plan by 45 degrees to get the result.
3. Draw the height line on z-direction, axonometry_z = original_z.
4. Draw faces and analyze the occlusion between faces, then make proper deletions.
5. Similar to isometric drawings, you can use 45-45 degree axonometric to draw exploded views to show more details.
The workflow is shown in the following pictures.(The drawing of adding details is omitted here because the technique is the same.)
Picture: Fanyi Jin
30-60 Degree
1. Draw a horizontal line, then draw the axis of 30-60 degree axonometry.
2. Draw the plan on the axis, axonometry_x = original_x; axonometry_y = orginal_y. Rotate the plan 60 degrees to get the result.
3. Draw the height, axonometry_z = orginal_z.
4. Draw faces and analyze the occlusion between faces, then make proper deletions.
5. Similar to isometric drawings, we can use 30-60 degree axonometric to draw exploded views to show more details.
The workflow is shown in the following pictures.(The drawing of adding details is omitted here because the technique is the same.)