|
Drawing 3D: Perspective Section
Goals
A perspective picture gives a sense of spatial depth. Usually, in architectural drawings, we use linear perspective. According to the number of vanishing points, linear perspective includes one-point perspective, two-point perspective, and three-point perspective.
The perspective section is usually a one-point perspective with accurate section line drawing. Now we aim at learning the basic principles of perspective drawing.
Content in a nutshell
- The lines on the z-axis of the one-point perspective and two-point perspective are vertical. The position of the vanishing point will affect the perspective composition.
- To draw a perspective section, first draw the accurate section lines. Connect the vertices of the section lines of the object to the vanishing point, those diagonal connection lines are called orthogonals.
- The objects that have a contextual relationship follow the rule of "the further, the smaller". The perspective position of each point is determined by the intersection of the horizontal line of sight and the baseline.
- The perspective section usually contains a lot of information.
Linear perspective
One-point perspective: …a mathematical system for representing three-dimensional objects and space on a two-dimensional surface by means of intersecting lines that are drawn vertically and horizontally and that radiate from one point on a horizon line…
Two-point perspective: two vanishing points.
Three-point perspective: three vanishing points.
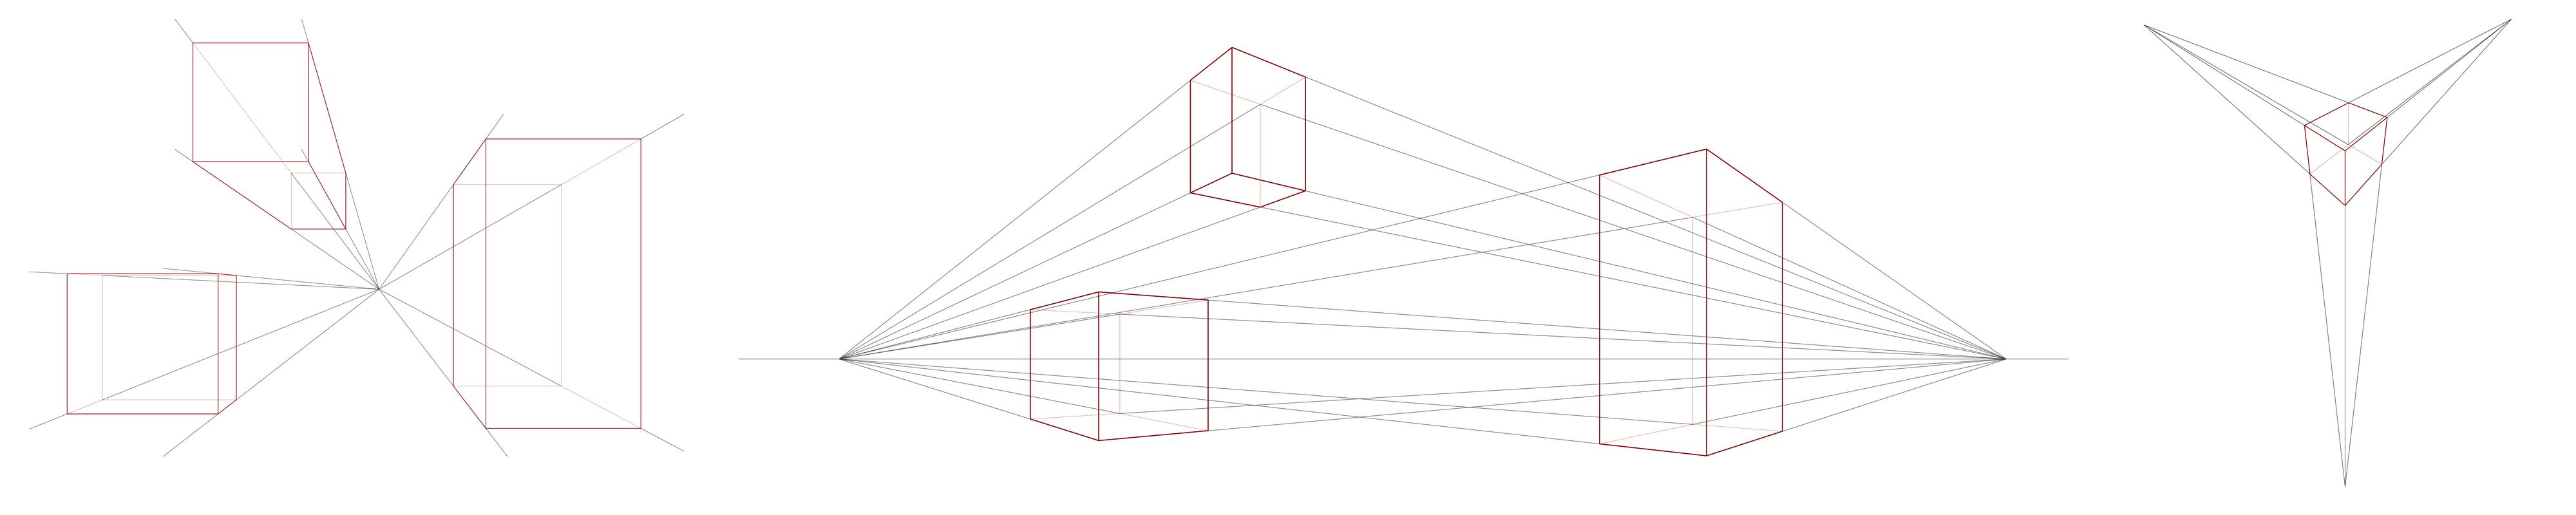
Left: one-point perspective; Middle: two-point perspective; Right: Three-point perspective. Picture: Fanyi Jin
There are several notions related to perspective. Let's take a one-point perspective as an example.
Vanishing point: The picture below shows the effect of different vanishing points. The two pictures share the same objects, they are placed in the same position and have the same depth of field. The vanishing point of the left picture is located relatively upper than the right one. This distinction could be understood as our eyes looking at the objects at different heights and angles. The higher the viewpoint is, the larger the top surface could be seen.

Picture: Fanyi Jin
Zoom in and out: The picture below shows the effect of zoom in and out. The two pictures share the same objects, they are placed in the same position and have the same vanishing point. The left picture zooms out relatively further than the right one. This distinction could be understood as we move closer and further towards the objects. The closer we zoom in, the larger the object is, while the smaller the view range is.

Picture: Fanyi Jin
Draw one-point perspective
Next, let's see how the " the further the smaller" rule could be drawn accurately.
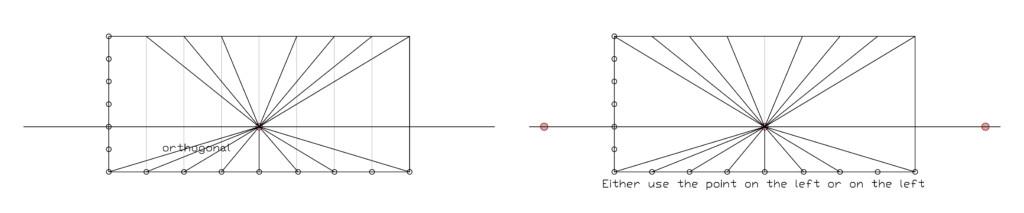
- Draw a reference rectangle frame.
- Draw a vanishing point and a horizontal line passing through it. This line represents the view level (the plan of our eyes position), called the horizon line.
- Connect all the vertices to the vanishing point, these lines are called orthogonal.
- Draw two points on the horizon line, the further you zoom out, the longer the distance between this point and the vanishing point is.
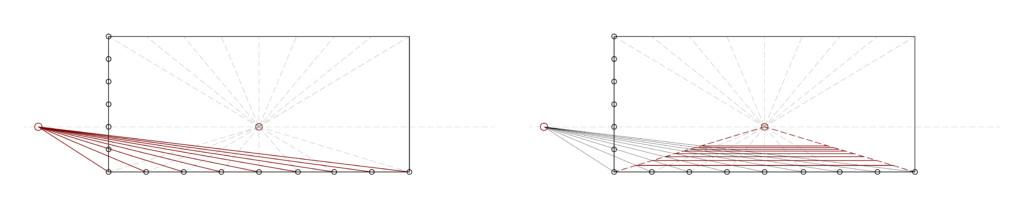
- Measure the distance of the points on the eyesight direction to the origin point (the bottom left vertice of the rectangle frame), and mark it on the baseline. Connect the point on the horizon line and the vertices on the baseline (the bottom line of the reference rectangle frame). The intersection points of these connection lines and the orthogonals show the position of objects along the eyesight direction.
- Mark the height of the vertical lines on the left line of the reference frame. Connect the height point with the vanishing point. Draw vertical lines through the intersections of step 5, these vertical lines intersect with the connection lines we just draw. In this way, the vertical lines with accurate perspective height are drawn.
- Place all the lines in the correct position.


Pictures: Fanyi Jin
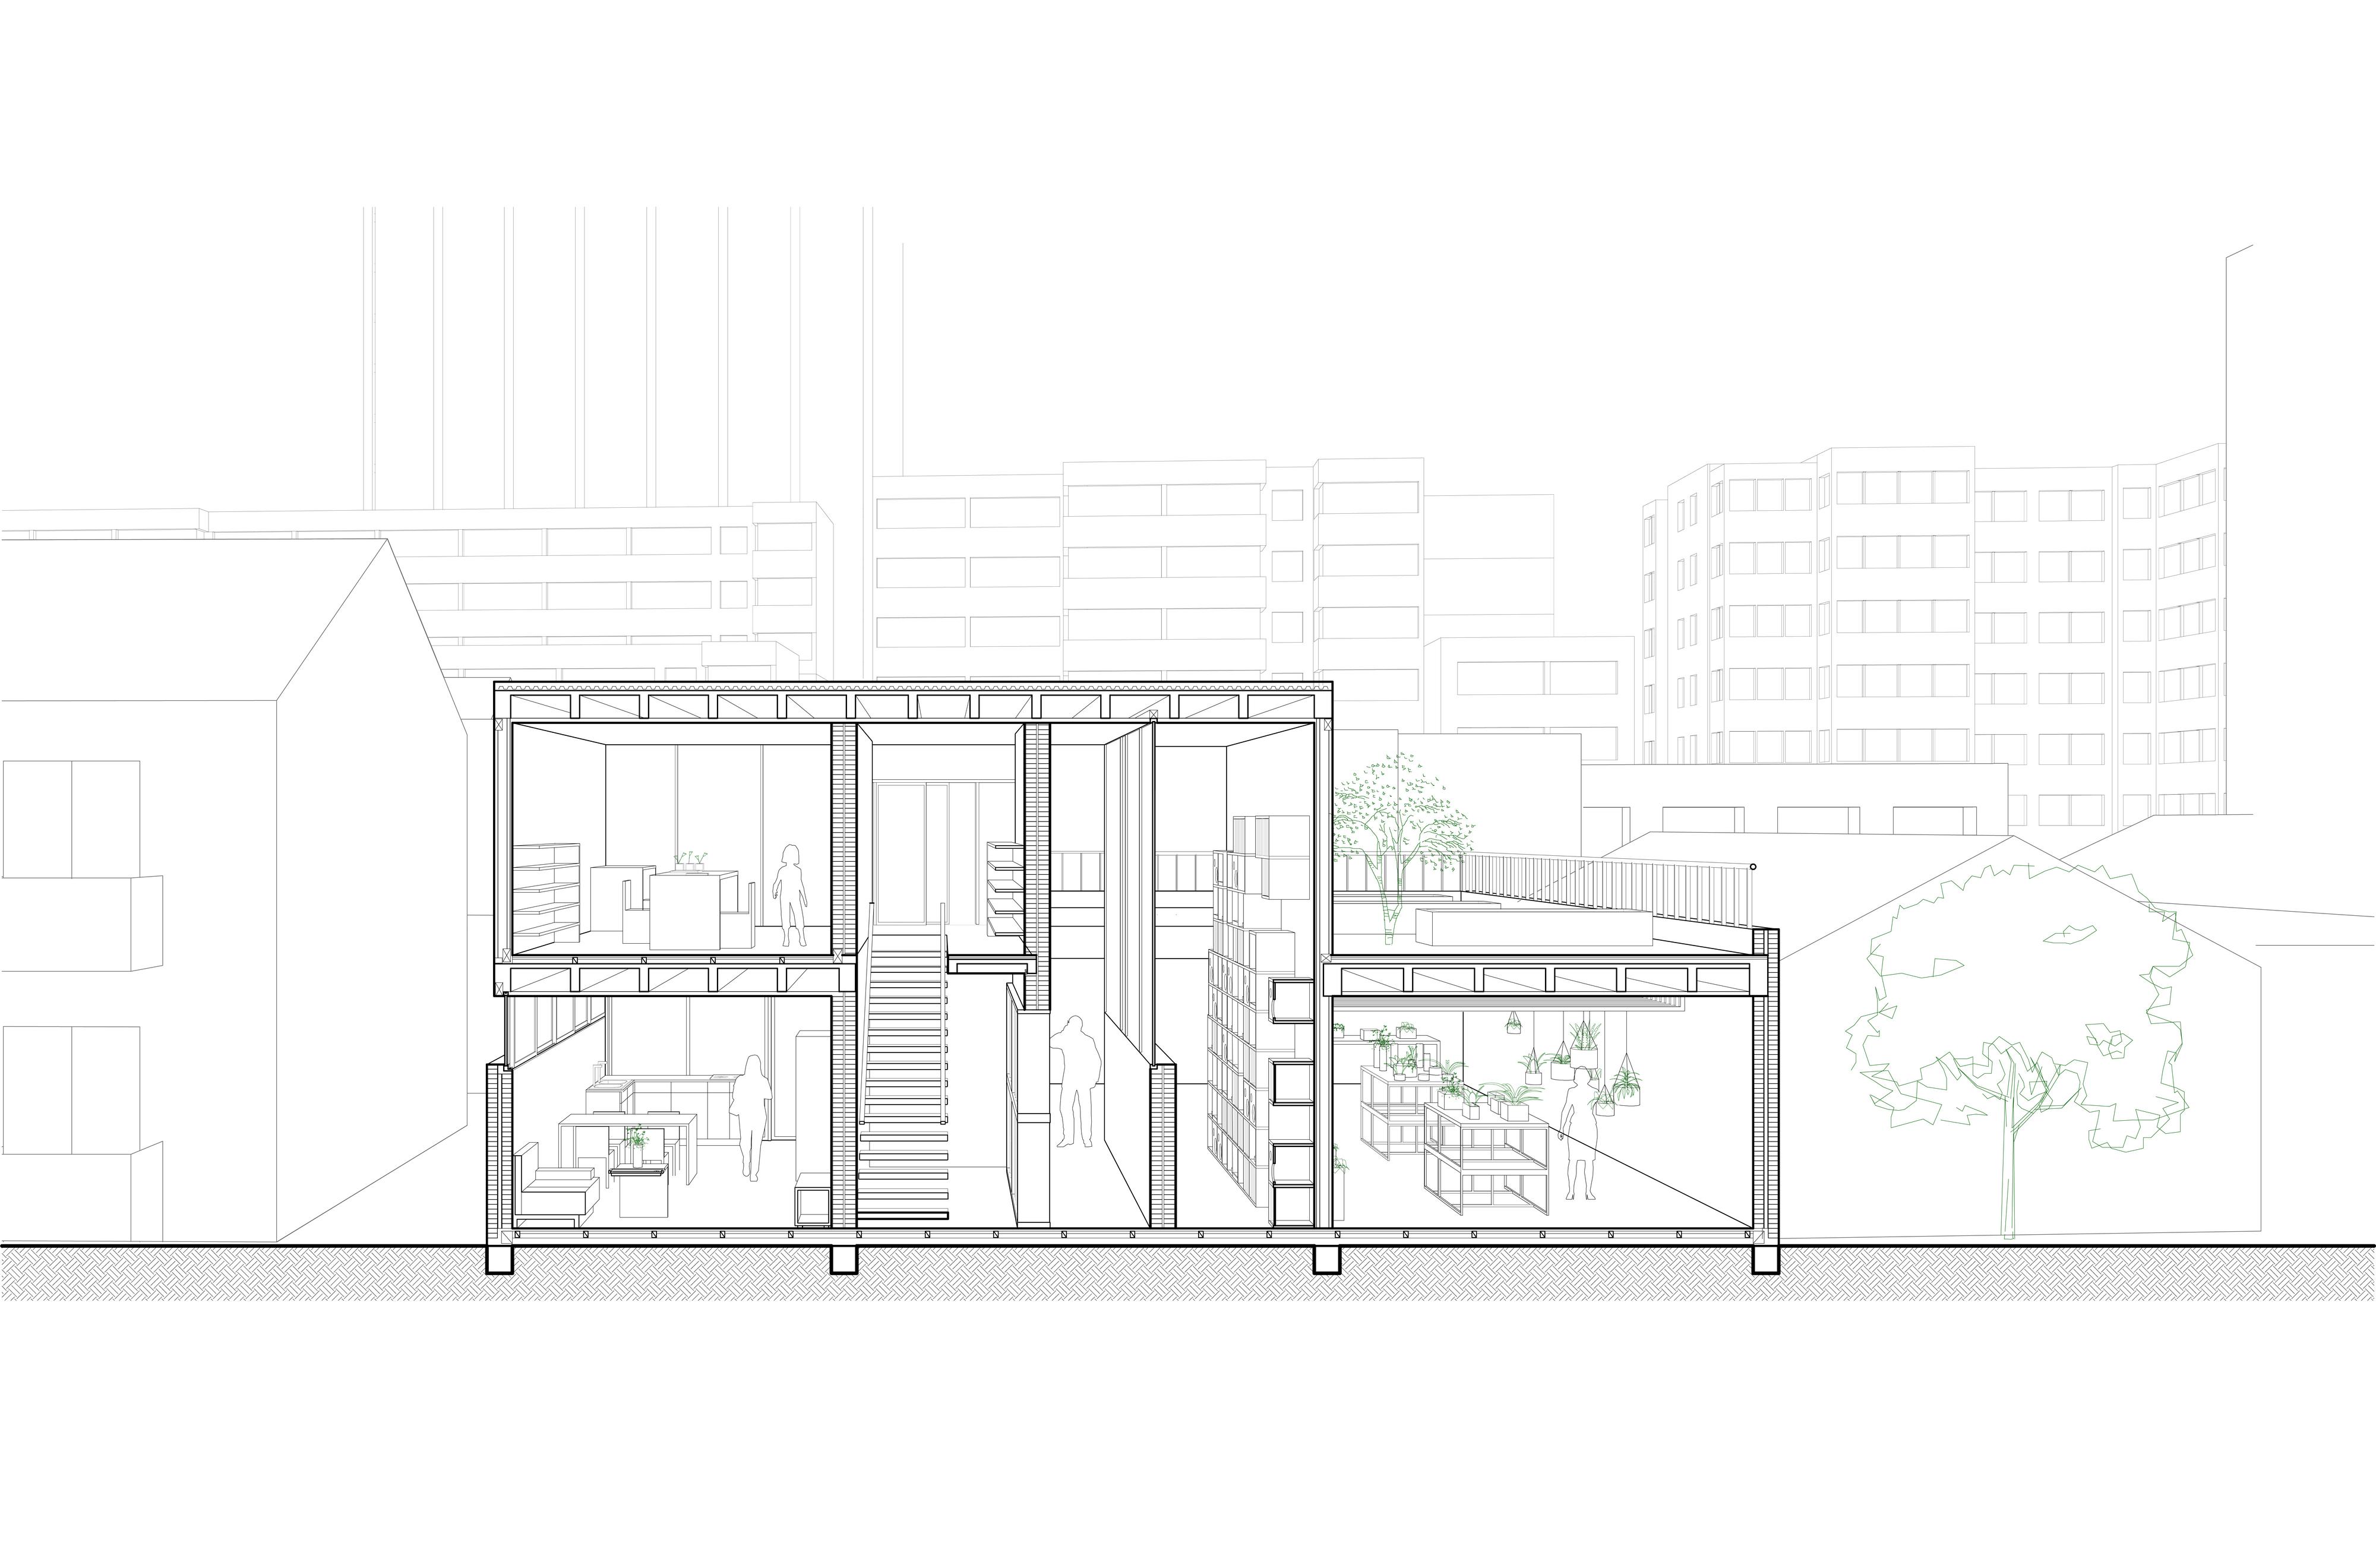
Perspective section
Excellent examples of perspective sections can be found in the work of Atlier Bow-wow (Japan), you can also reference the book Manual of Section.
- Draw an accurate section.
- Remove the view lines, leave the cutting lines only. Then add a proper vanish point and a measuring point (see step 4 of Draw one-point perspective above).
- Connect all the vertices of the shown faves to the vanishing point.
- Draw horizontal lines and vertical lines (see steps 5 and 6 Draw one-point perspective above).
- Add section details, such as material layers, equipment, etc.
- Add scene details, such as furniture, people, etc.