|
Embedding 3D Models To a Photo
Goals
In this example, we add 3D objects to a photo. For a realistic result we need to:
- Choose background photo/backplate
- Match viewpoint & perspective (+ set up geometry)
- Add HDR environment (lighting & reflections)
- Setup ground plane (shadow & reflection catcher)
Background Photo
When choosing a background there are many things to consider. In this guide, we focus on technical aspects. The image should have enough resolution/pixels for the intended use. Low-quality pixelated images should be avoided. It is many times helpful if the image has a very clear vanishing point, perspective lines, etc. Also, make sure that you have the right to use the images (appropriate license).
Viewpoint & Perspective
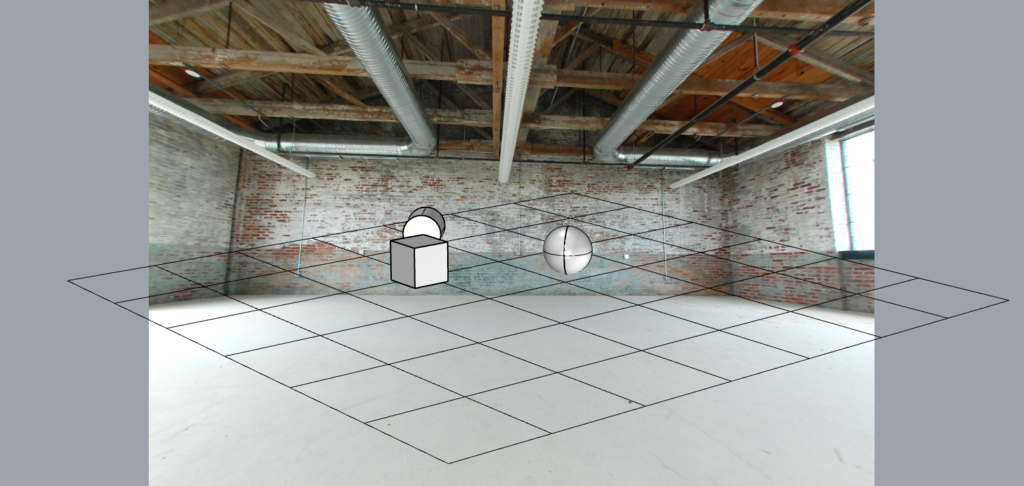
The scene not matched to the photo. Picture: Anssi Ahonen.
Once the background image has been chosen the next thing is to position 3D objects over the photo in a realistic way. The viewpoint and the perspective/camera focal length should be taken into account. One can approximate the right settings (eyeballing it) but usually, it is better to do this in a more constructed way.
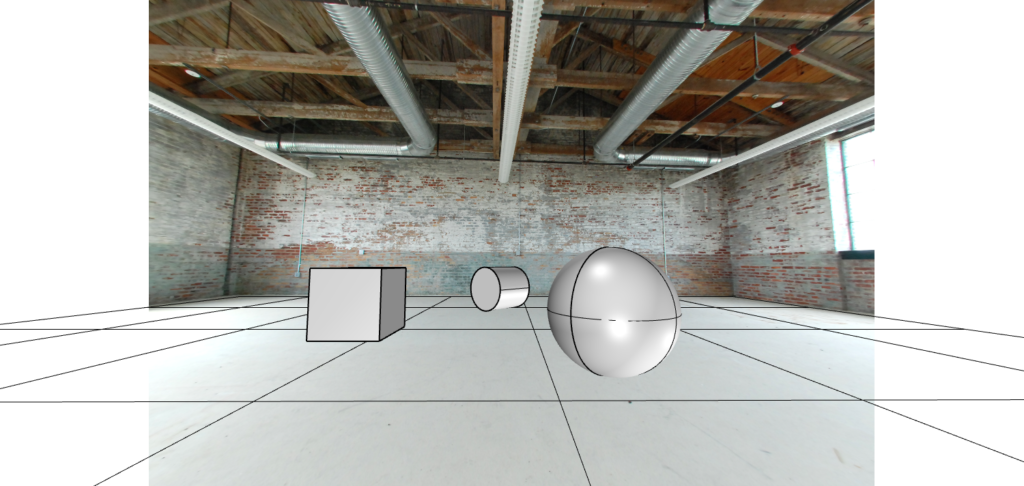
Camera position and the focal length matched to the photo (lense information from the EXIF data). Picture: Anssi Ahonen.
Photos have metadata that contains information about the camera setup.
In Windows right-click a photo and choose properties and then details. If EXIF data is present you can find the used camera focal length. Note that you should use the 35mm full-frame equivalent number. Use this focal length also in the visualization software. Perfect matching is not always easy since camera lenses have distortion - no real-life lens is perfect. A simple ground grid helps to verify the results. Also, consider the scale of the objects.
HDR Environment
360-degree HDR images can be used as an environment that produces the lighting and the reflections. HDR stands for High Dynamic Range which means that there is more information saved than in a normal image – a white T-shirt has white color but is not as bright as the sun (light source).

A matching 360 degree HDR image is added as an environment and positioned accordingly. Note that HDR environments have some distortion. Picture: Anssi Ahonen.
If you have a matching (to the photo) HDR environment the result can be very convincing. But many times, even somewhat similar HDR maps can create close enough results so testing different maps is possible. As with the background photo, make sure you have the appropriate rights to use the HDR image.
Ground Plane
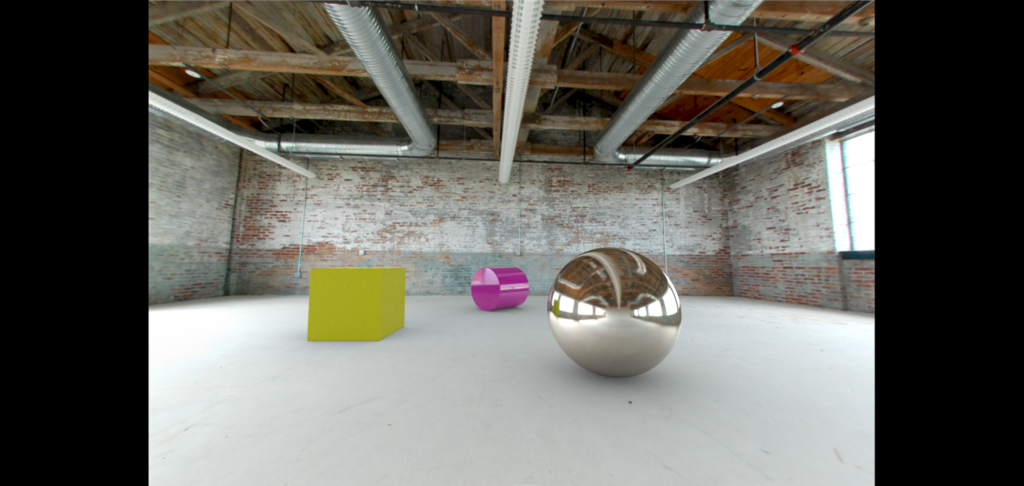
A finished render with ground shadows and materials added to the objects. Picture: Anssi Ahonen.
Objects interact with their environment. Adding an invisible (to the camera) ground plane that catches the shadow and reflections helps to connect 3D objects to the photo. Some software have also other parameters for the material so it can interact with the 3D objects more (reflect light back to the objects for example).