|
Layer Masks
Goals
Layer masks are one of the most important tools in mastering photo manipulation. In this chapter, you will learn what layer masks are and how to use them.
Content in a nutshell
- A layer mask is a tool that controls a layer's opacity.
- White color makes the layer visible, where black color makes the layer invisible.
- Layer masks can be added to any layer and removed at any point without permanent changes.
What is a layer mask?
In addition to layers, layer masks are one of the most important things that make image editing easier.
Understanding the concept behind a mask can be challenging at first. The mask could be thought of as a liquid surface that is added to the layer and either removed or added to its surface. The mask itself does not bring changes to the image but acts as a tool to reveal and mask an image surface or a created effect. Also, the mask never makes permanent changes to the layer.
The main rule to remember when it comes to masks on a layer is that white color makes the layer visible, where black color makes the layer invisible. In other words:
White reveals.
Black conceals.
When a mask is added to a layer, it is automatically white and covers the entire layer. White means that the entire content of the layer to which the mask has been added is displayed. By inverting a mask (cmd / ctrl + i) it becomes black, which means that the layer, where the mask is, is visible.
Masks are modified using brushes and black and white color. Because of that, you can also take advantage of using different opacity levels in your brush to make a more subtle modification.
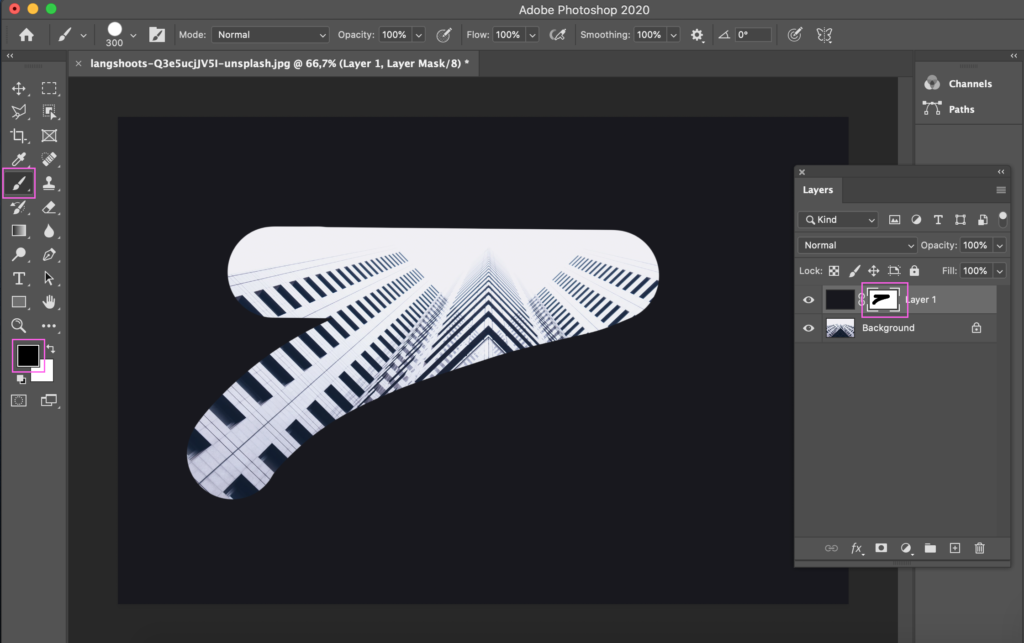
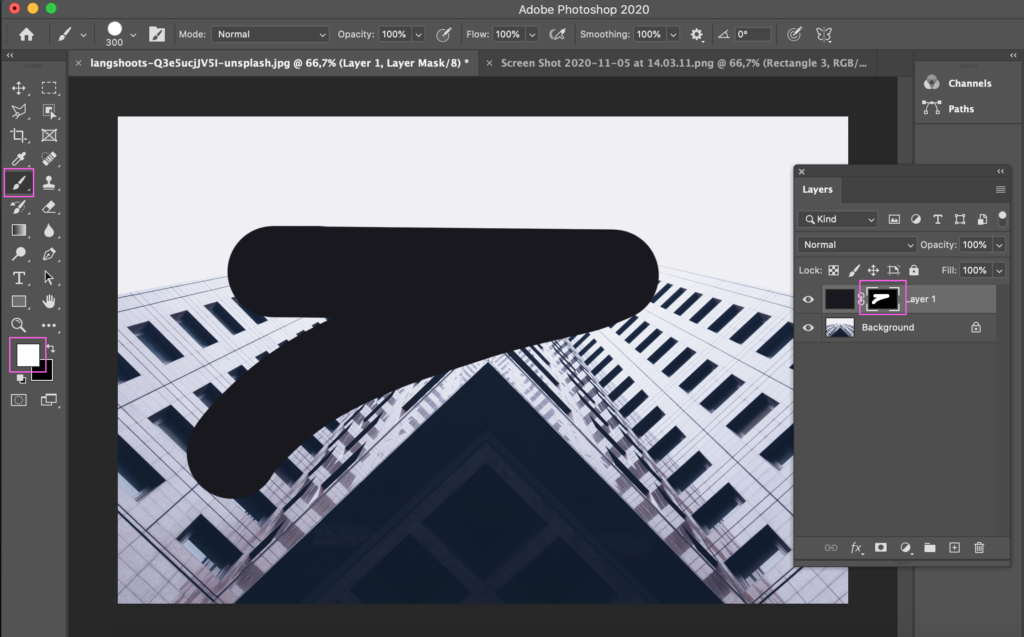
Opacity in a layer and in a layer mask
In the previous chapter, we talked about how a layer's transparency can be modified by calculating the opacity of a layer.
However, if we wanted to control in even more detail, so that the opacity of the center of a given layer would be 10%, for example, while the rest of the image would be 100% opacity, we would use a layer mask and brush and only affect the center of the image with the mask. In other words, a mask can easily be used to delimit a specific area to be affected.
Masks are very useful in photo collages that combine multiple images on top of each other. In the example below, images of the sky and grass have been combined with an architectural model in an image editing software. In the next chapter, we will take a closer look at how the sky is edited to another photo using layer masks.
See the process where on how the photos in the slideshow below were combined into a photo collage:
Photo 1: Anthony Cantin on Unsplash; Photo 2: Hannu Rytky, Juha Nissinen, Matti Lakkala; Photo 3:Phil Goodwin on Unsplash
Photo collage with layer masks
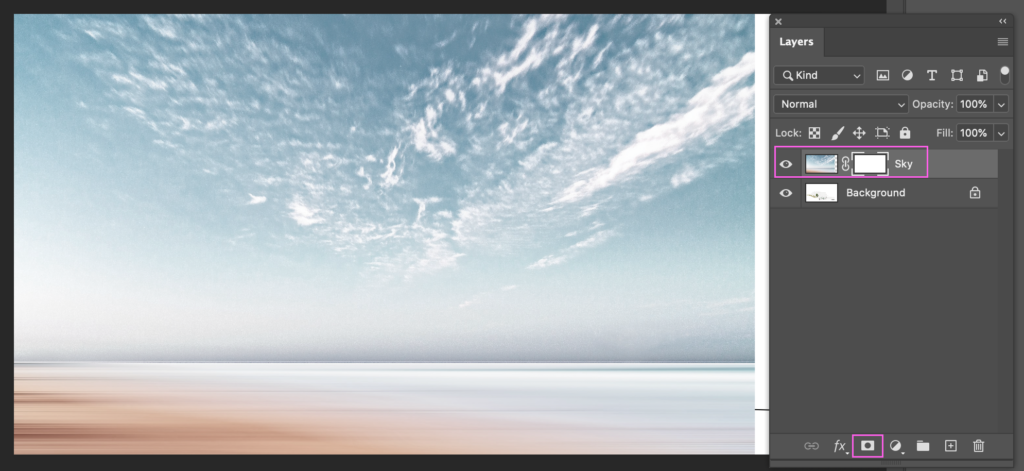
First, we have two photos. Below, an image of the sky has been placed on top of the image imported from the modeling software. The image is first brought over the background image to its own layer.
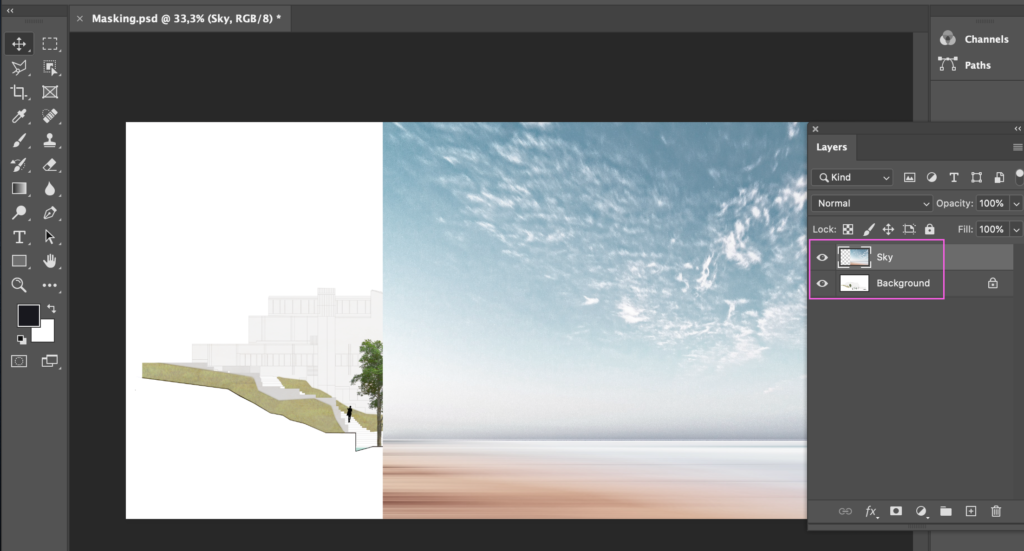
A mask is then created on top of the image, which is inverted from white to black so that the image on top is not visible at all.
Inverting white to black is easy to do with a command: cmd + i.
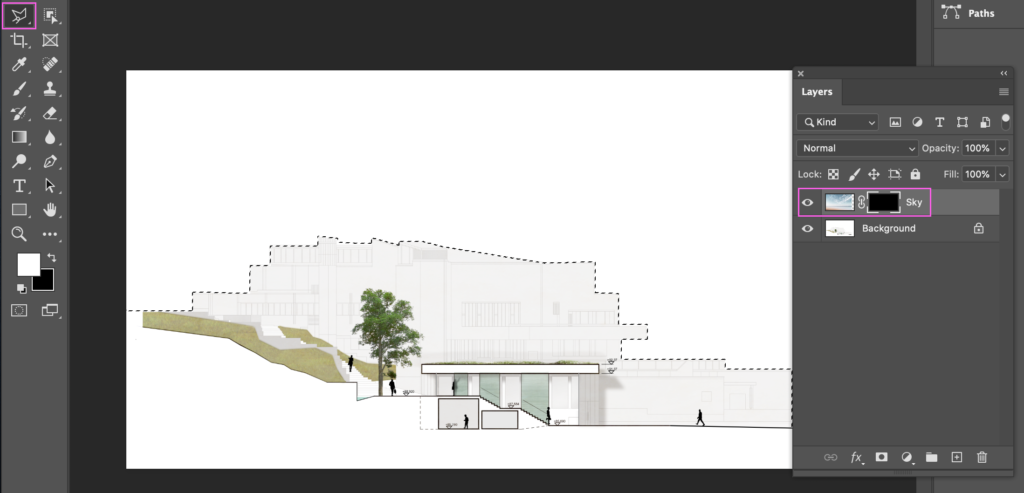
After that, a selection of the building is done with a magnetic lasso tool. The selection is going to mark the area where the sky layer will be invisible. The selection will be the same in every layer of the file.
Then, the layer mask is selected and inverted by pressing the same command, cmd + i. You can see how the layer mask is now black and white, where white marks the area where the sky layer is visible and where black marks the area where it is invisible.
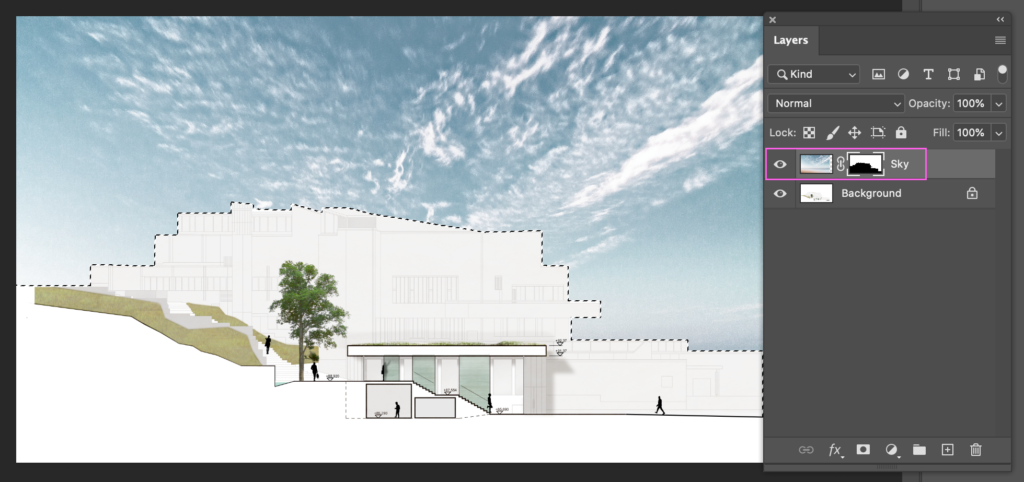
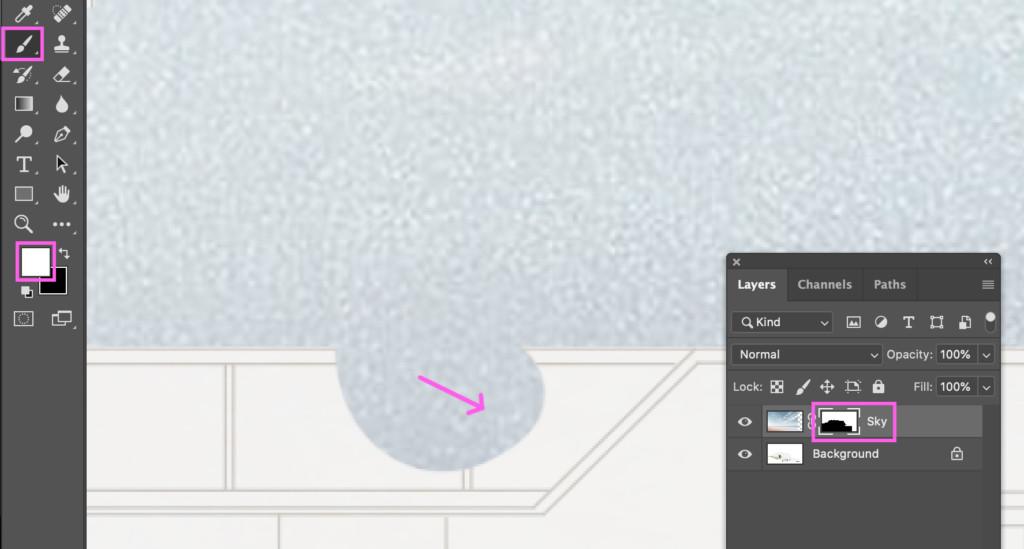
After that, smaller fixing could be done with brushes.
