|
Shadows and Lights Using Brushes and Layer Styles
Goals
We will briefly discuss how brushes can be used, especially to create light and shadow in image editing. In addition, we will handle layer styles and how you can create shadows and light by using them to create a more realistic composition.
Content in a nutshell
- Shadows and light can be painted to their own layers with a brush using opacity in the color or in the layer.
- Layer style options have their own effects for creating shadow and light into an object, such as drop shadow and inner glow
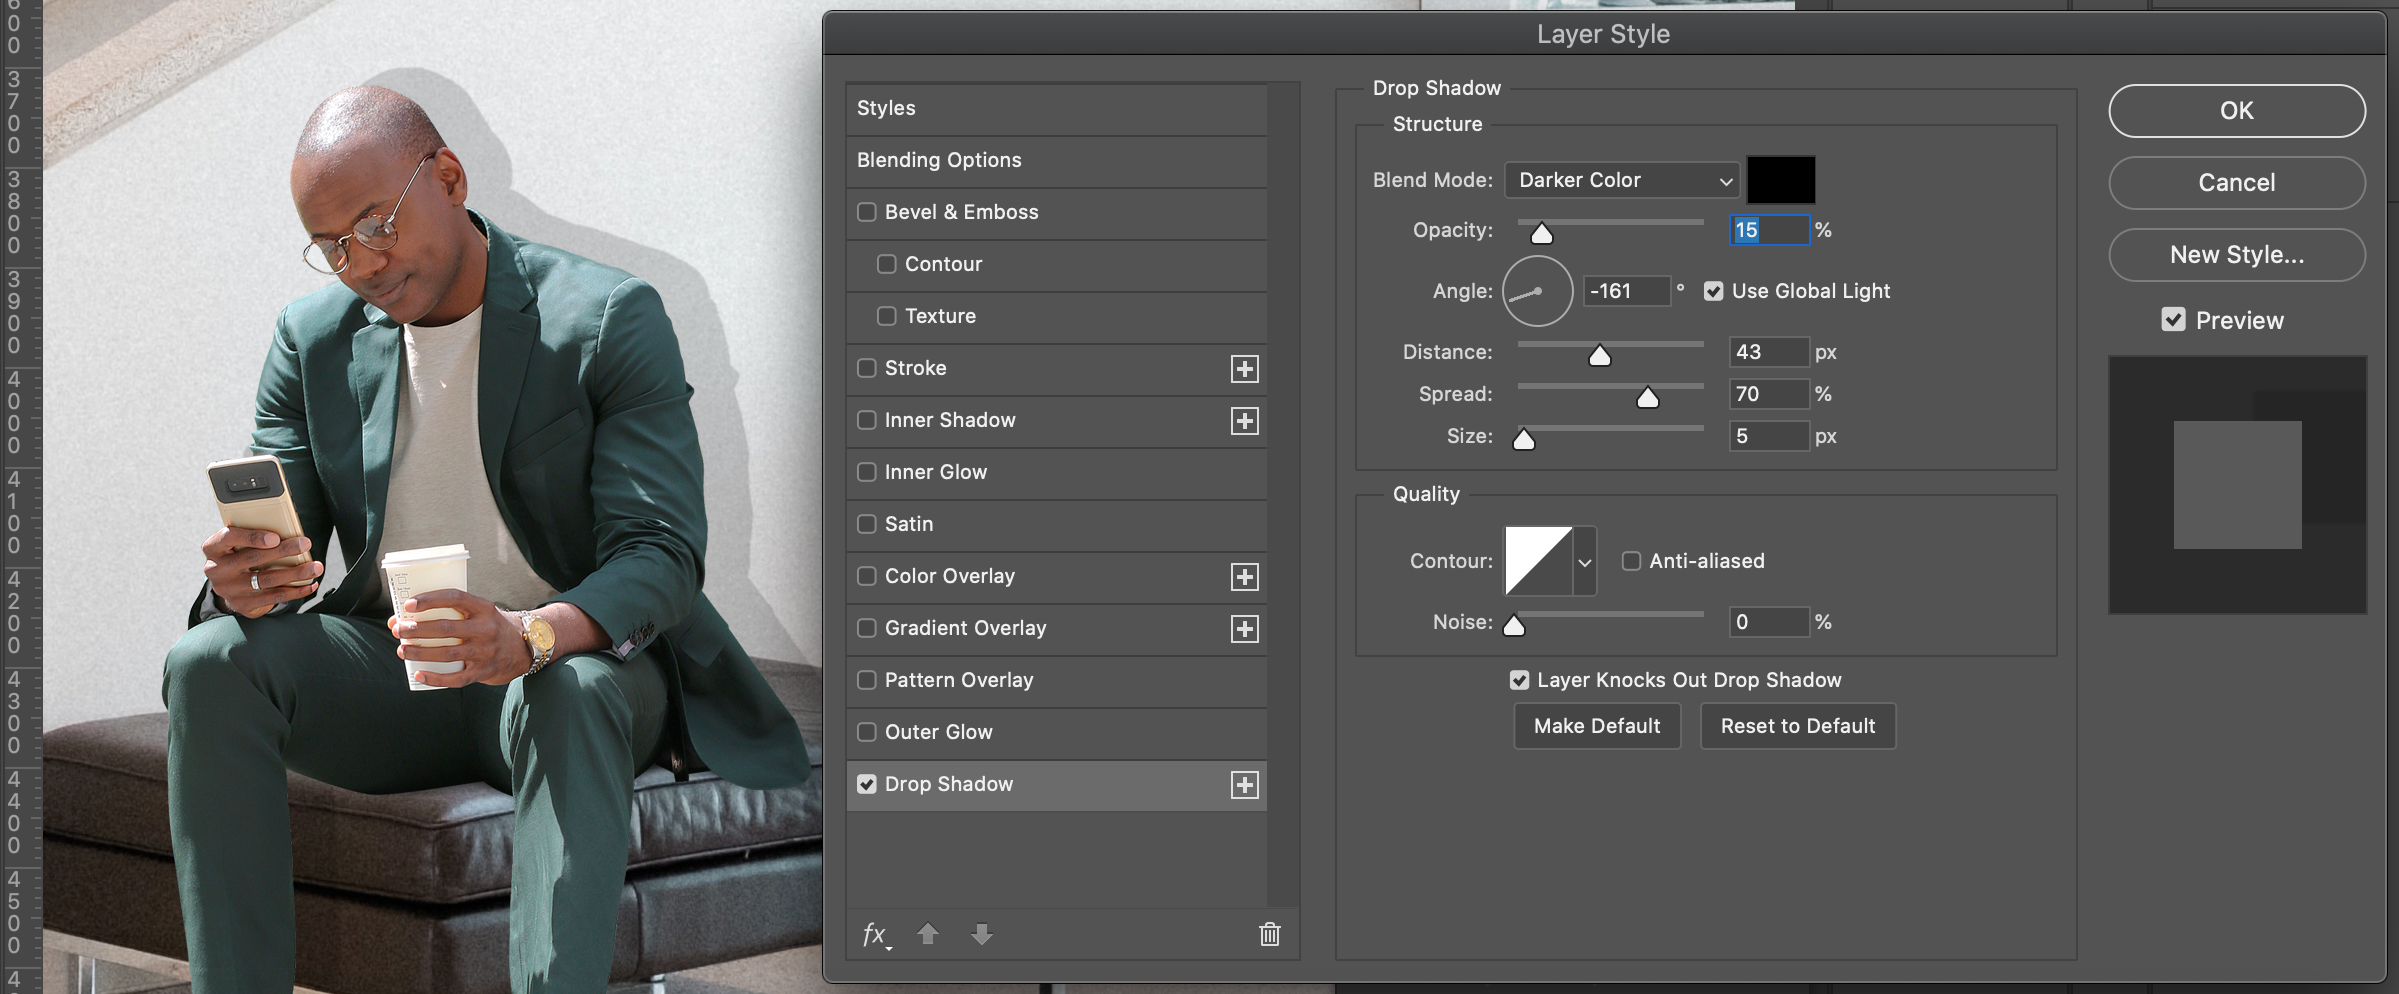
Layer Styles
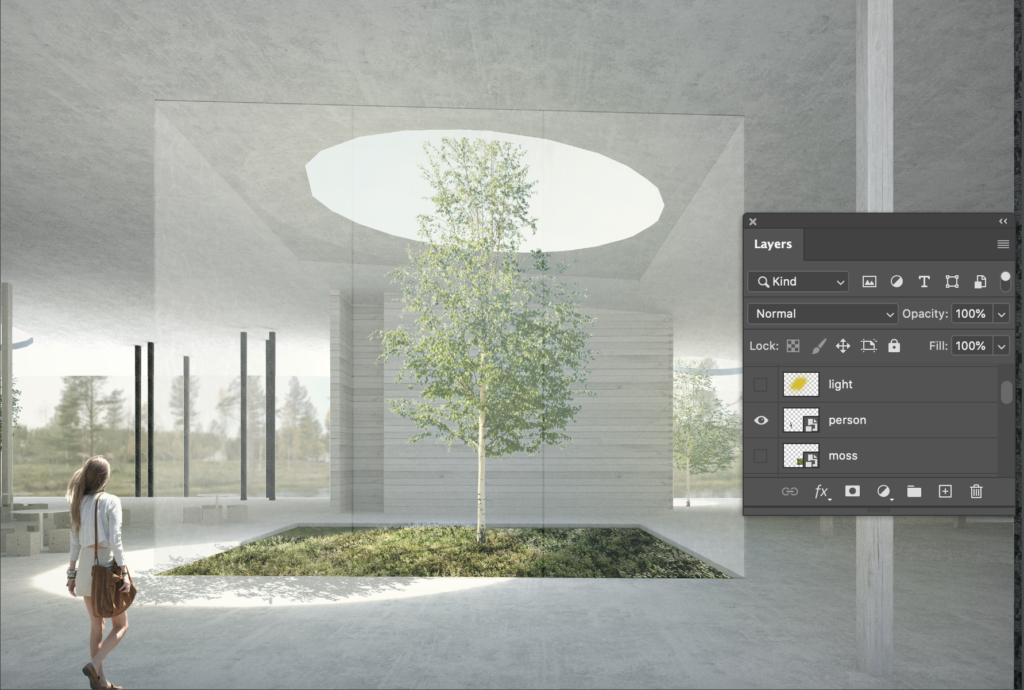
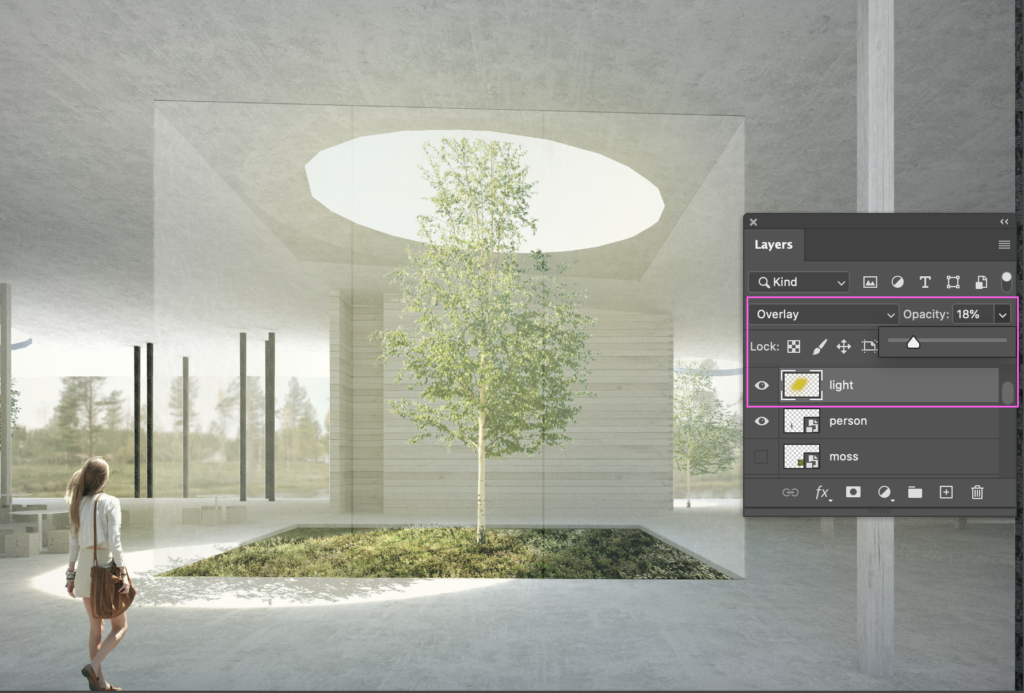
When elements are added to an image collage, shadows and lights can be added to them in the layer style found at the bottom of the layer panel by pressing the fx icon.
The most useful of these are probably drop shadow, inner shadow, and inner glow. The color of the shade and the light, their blending mode, opacity, distance from the element, effect size, and angle of light or shadow direction can be modified. A single object can also have several different effects, such as inner shadow and inner glow.
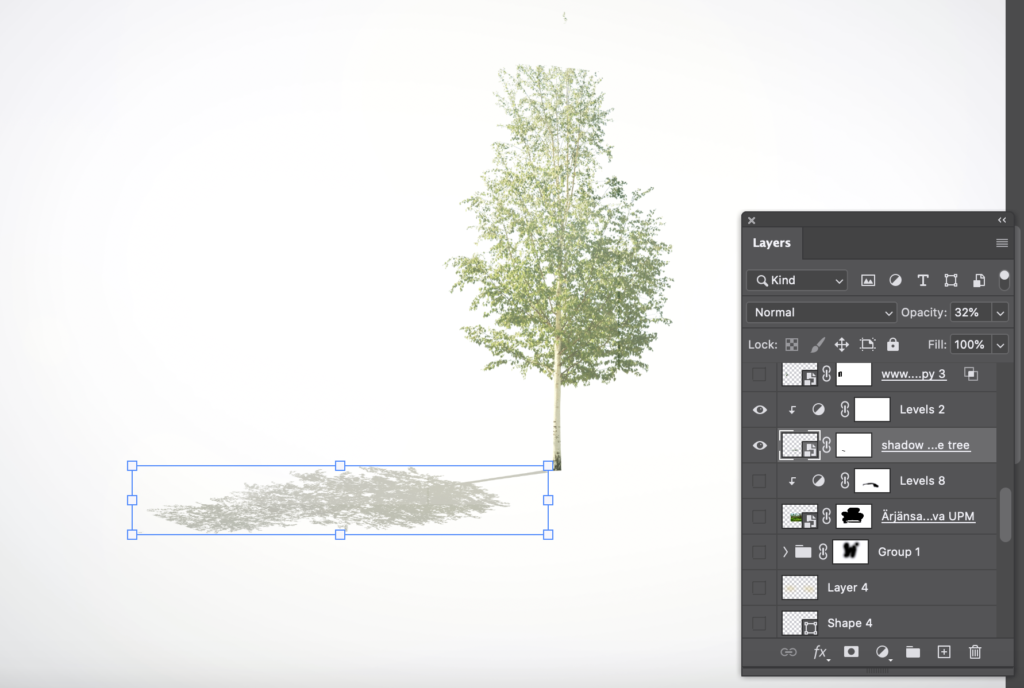
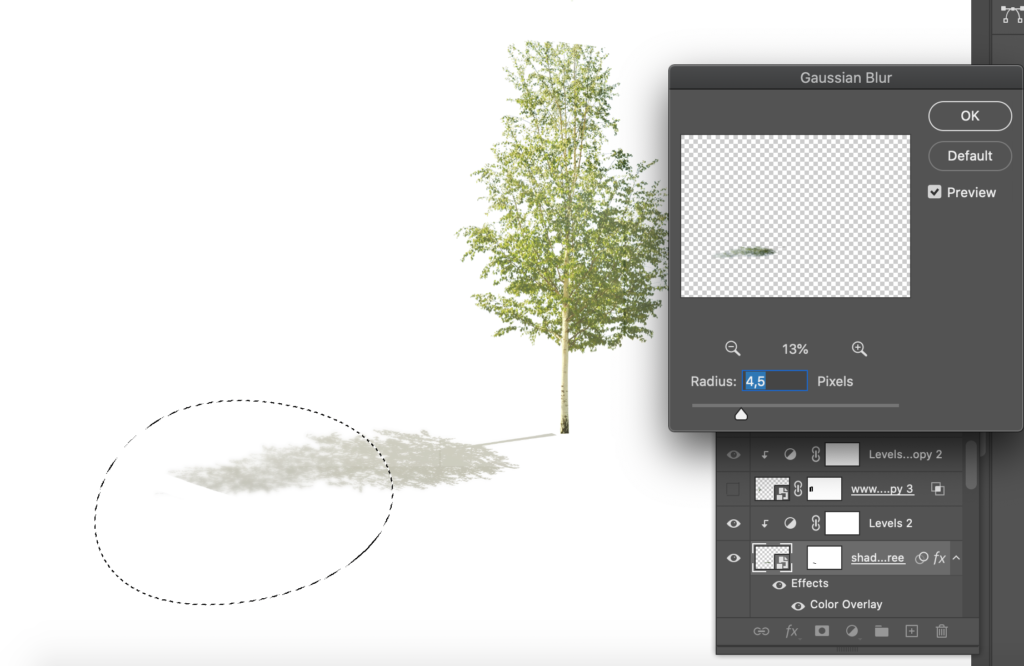
Color Overlay & Gaussian Blur for shadows
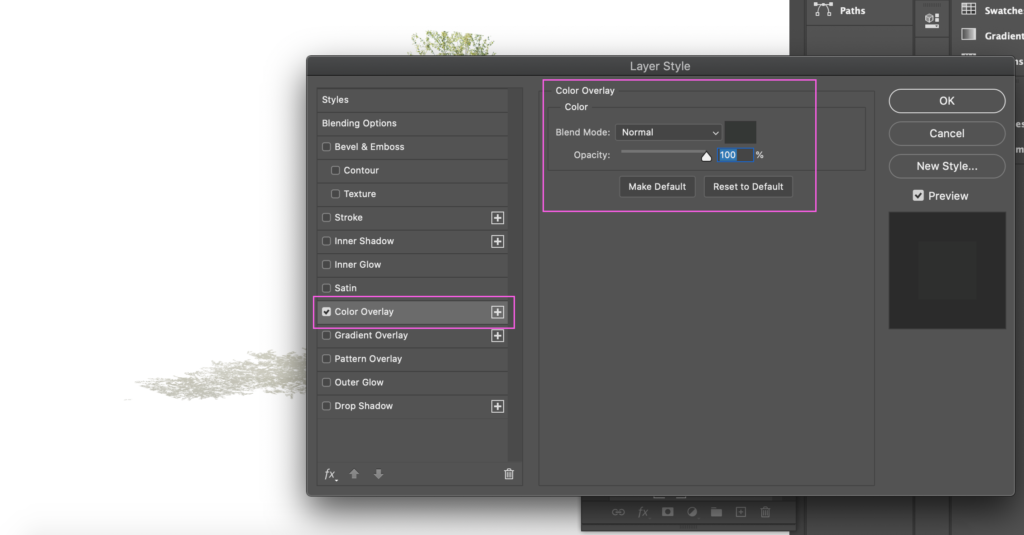
In addition, one of the layer styles can also be used in another way to create a shadow: if you want a shadow for the element that reproduces the shape of the element, copy the element to its own layer and change its orientation by selecting the element, pressing cmd / ctrl + T, and adjusting the shadow direction, size, and perspective. The color overlay is then selected for the layer from the layer style options. Color Overlay determines what color the shadow will be and whether to cover the entire element with that color or only partially, changing the opacity of the color.
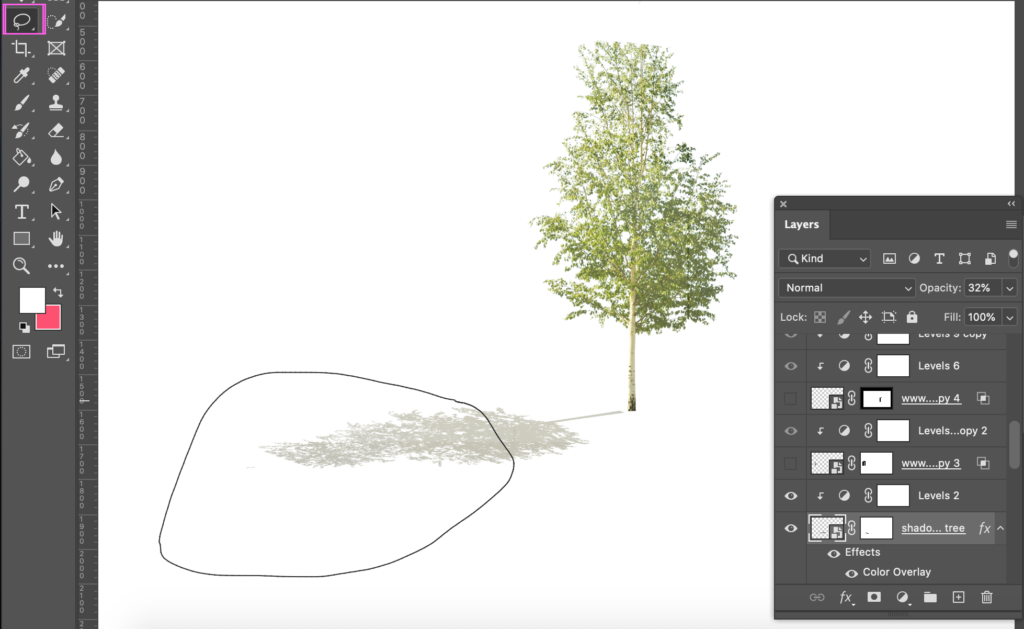
After this, the shadow can be further softened. In Photoshop, this is done by going to the top menu filter -> Blur -> Gaussian Blur, where you can choose how much you want to blur the shape of the object by the percentage. If you only want to blur the shadow partly, for example, so that the shade begins in more contrast below the tree and softens away from the tree, this is also possible to do. Then, before using the blur filter, a part of the element would be selected with a selection tool, such as lasso tool, the edge of the selection would be softened with the feather adjustments in the Select and Mask window, and only then the blurring would be added the same way as mentioned above.


Painting shadow and light
Painting shadow and light, on the other hand, is more intuitive and technically simpler. Painting light and shadow should also be done to their own layers.
It is often good to have the shadow under the object itself, while the light descends on top of the object. The opacity of the paint and layer as well as the blending modes of the layer further adjust the desired effect. The size of the brush tip should be big and the hardness of its edge should be low in most cases.
Original photo: Anna Pekkarinen, Hannu Rytky

Original photo: Timothy Rhyne on Unsplash. Person in the picture: MR.Cutout
or