|
Levels
Goals
In this chapter, you will learn to use Levels for color and exposure adjustment. Levels is a great and simple tool for adjusting the photo. Levels let you control both the highlights, mid-tones, and shadows of the photo as well as all the colors with color channels. Levels also have automatic tools for correcting white balance and exposure.
Content in a nutshell
- Levels is an adjustment tool for adjusting both color and exposure
- Levels has an eyedropper tool that can be very useful for correcting white balance
- Levels gives you a great amount of control without being too complex
Levels Window & Histogram
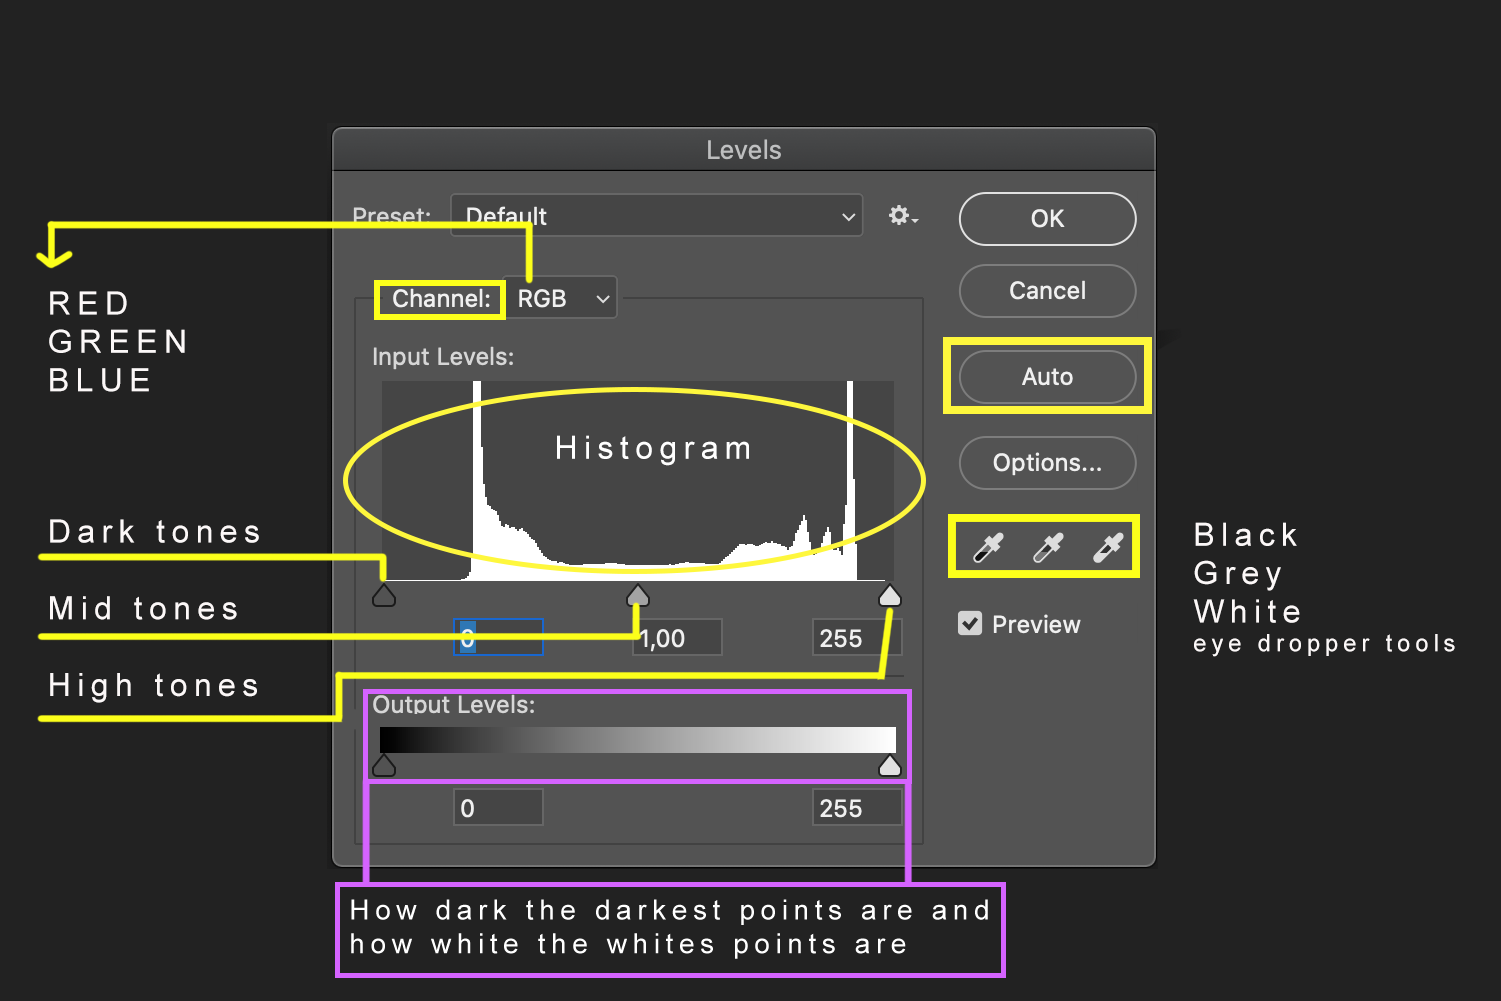
Levels adjustment is a great and simple tool for correcting both color and exposure. Levels, as every other Adjustment can be found in Photoshop in the upper panel when you go from Window to Adjustments or in Adjustment layers panel in the layers window (see the chapter of Adjustment layers here). Shortcut for Levels is cmd / ctrl + L when working with Photoshop.
When we take a look at the levels window, we can see the Auto- mode button, which will do adjustments automatically. This can be a good place to start and edit the pre-made adjustments even further. Or you can always choose to adjust everything from the scratch as well.
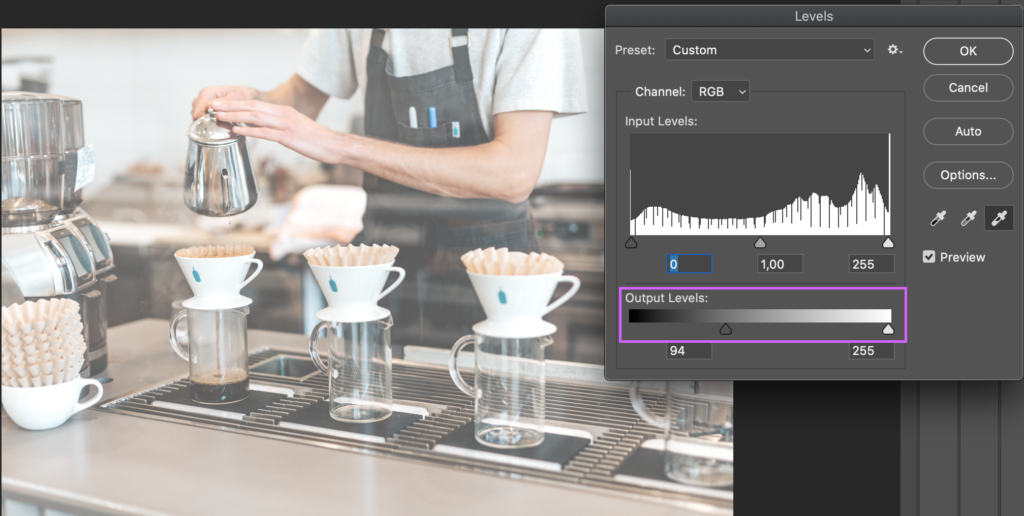
Then we can see that there is a histogram in the middle. The histogram’s left side represents dark tones in the photo and right, bright tones.
Little pyramid-like icons can be dragged in different directions. If you drag the black icon on the left side to the right, the image will be darker, and the other way around with the icon on the right. The icon in the middle will adjust the darkness and brightness of the mid-tones.
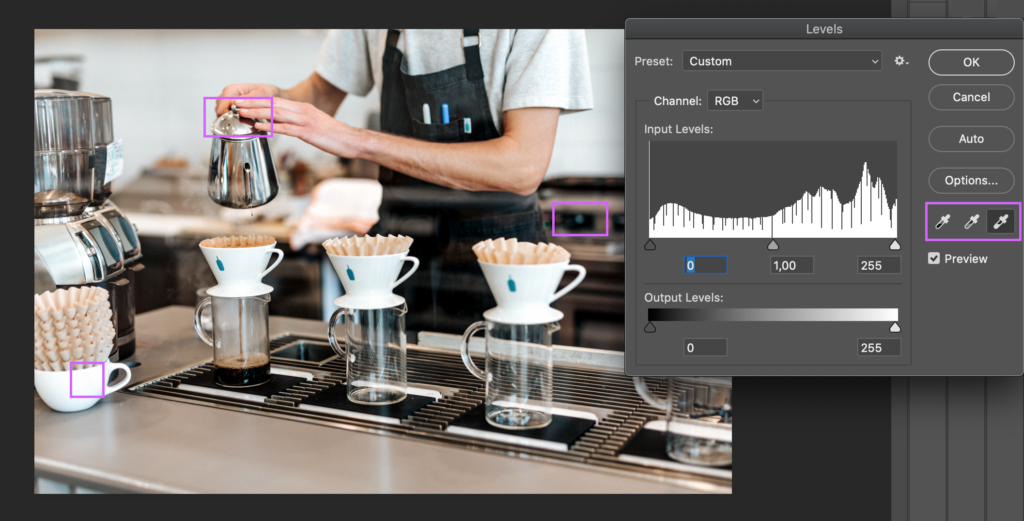
Eye dropper tools
We can also see the eyedropper tools for black, grey, and white. When clicking an area or an element on a photo that we know to be black / grey /white, levels will automatically adjust color and exposure according to that. If your photo has pure black, grey, and white areas, using this technique can offer great results. Sometimes, however, we need to adjust levels histogram manually.
Original photo: Tyler Nix on Unsplash.
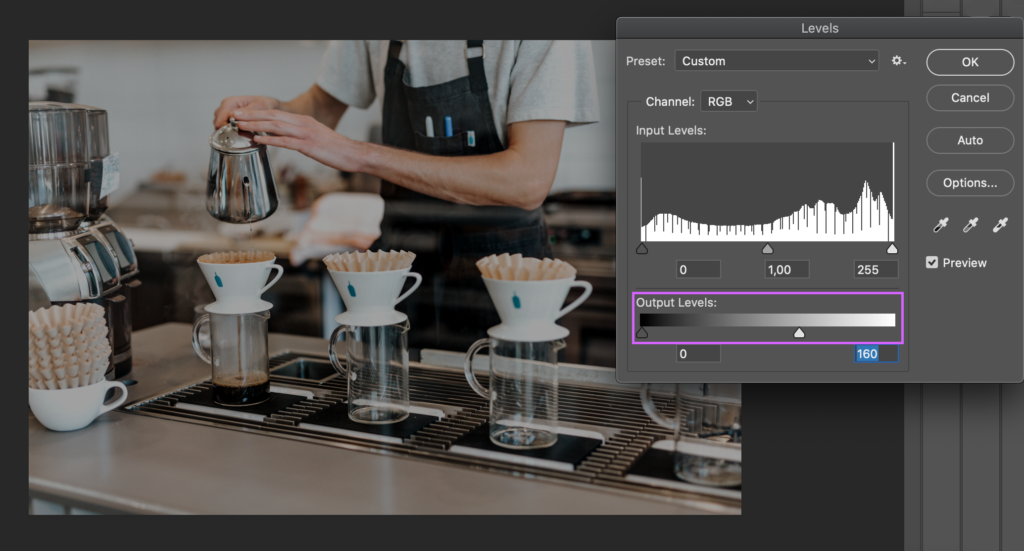
Darkest points and brightest points
The bar below the histogram adjusts how dark the darkest points are and how white the whitest points are. You can use all of these adjustments together, for example, you can add more lightness to the whole picture, but make them less white by lowering the whiteness of the whitest points.
Original photo: Tyler Nix on Unsplash.
Color Correction with Levels
Original photo: Tyler Nix on Unsplash.
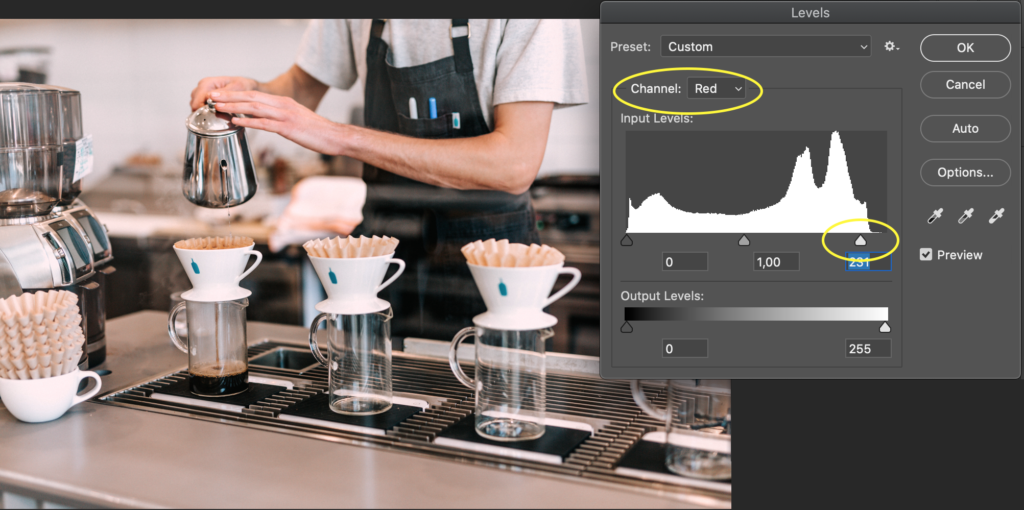
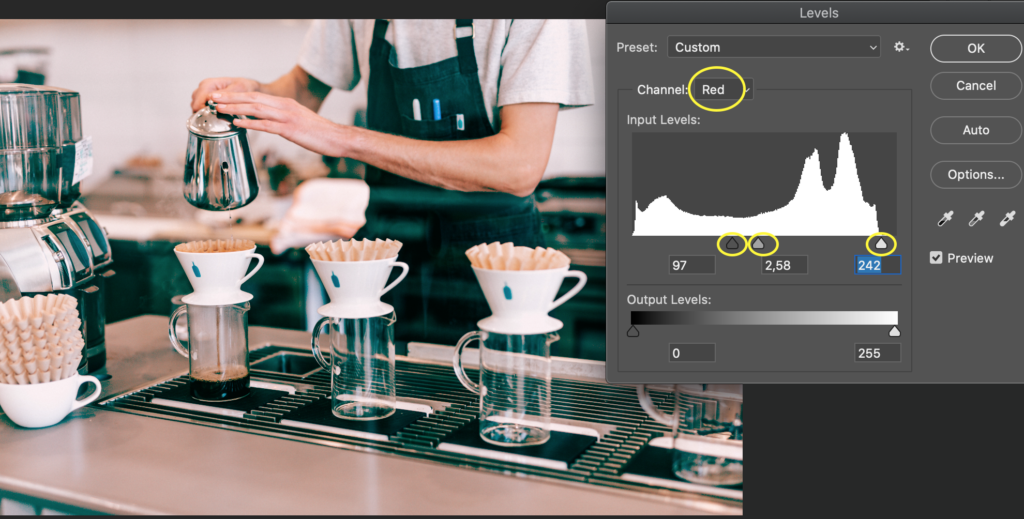
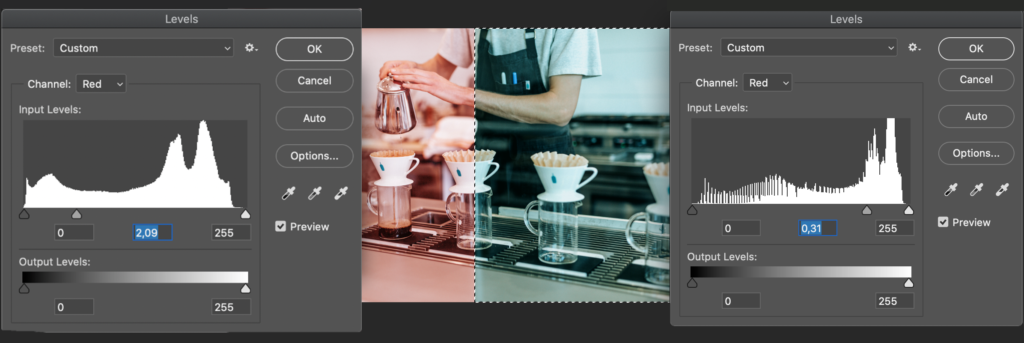
As mentioned in the intro, when editing color channels, you really need to think about the primary colors and opposite colors.
On each color channel, when you move the icon (little pyramid-looking icons below histogram) to the left side, that channel’s color will increase. So for example, in the red channel, if we drag the icon in the histogram to the left side, red increases. When we move the icon to the right side, the opposite color of the red, which is cyan, cyan will increase and so for, red will decrease.
The same goes with the other color channels as well. So, if your photo is too green, you will need to drag the icon to the right side and magenta will increase. Pay attention to which tones (shadows, mid-tones, highlights) you want to color correct. For example, if the highlights in the picture are too red, but the mid-tones are ok, you should use the pyramid icon on the right side of the histogram that controls the highlights in the picture.
Usually, in the color correcting process, you might need to adjust all of the color channels, including RGB, to get the best results.