|
Layers
Goals
You will learn what layers are, how to make your photo editing workflow smooth by using layer structures in an efficient way, how to lock and modify layers.
Content in a nutshell
- Layers are an essential part of the photo editing process and combining photos.
- Layers are like stacked, transparent films. Layers typically include different elements, textures, or other effects.
- Layers make combining multiple images and placing them in the canvas possible and easy. The order of the layers defines which content is visible. If there is a large element on the first layer, everything not the layers below will be invisible. Layers can be moved around within the layer structure. Lower layers can be seen at the transparent parts of the layer.
- The transparency of the whole layer can be changed. Then the elements and surfaces on that layer lower the opacity as well.
- Layers can be combined together into one layer. In addition, you can change how the layers blend with other layers.
- Layers can be locked, re-placed, deleted, named, combined, and grouped.
What are layers?

One of the most important things in image editing is layers, which are transparent surfaces that can be arranged in different orders, combined, and edited in a variety of ways. When composing different elements in photo editing software, each element usually has its’ own layer. Knowing how to organize layer structures is a foundation for a well-functioning photo file. In this chapter, we’ll cover the basics of layers.
The first layer is always the background layer, which is slightly different from the layers you add later. A background layer is either a photo opened in an image editing program or a white fill color. New, added, layers are always transparent. Transparency is indicated by a gray-white grid that appears in the layer window, but not in the actual file. In the Layer window, you can add layers manually, for example in Photoshop from the plus icon in the layer window. If you import another image into the same image file, a new layer in the same file is often created automatically.
Layers can be moved by dragging them in a different order in the layer window, this can be done as many times as needed. When working with layers, it is always important to know which layer you are working on at any given time, otherwise, you may accidentally create content on the wrong layer.
Naming and Grouping Layers
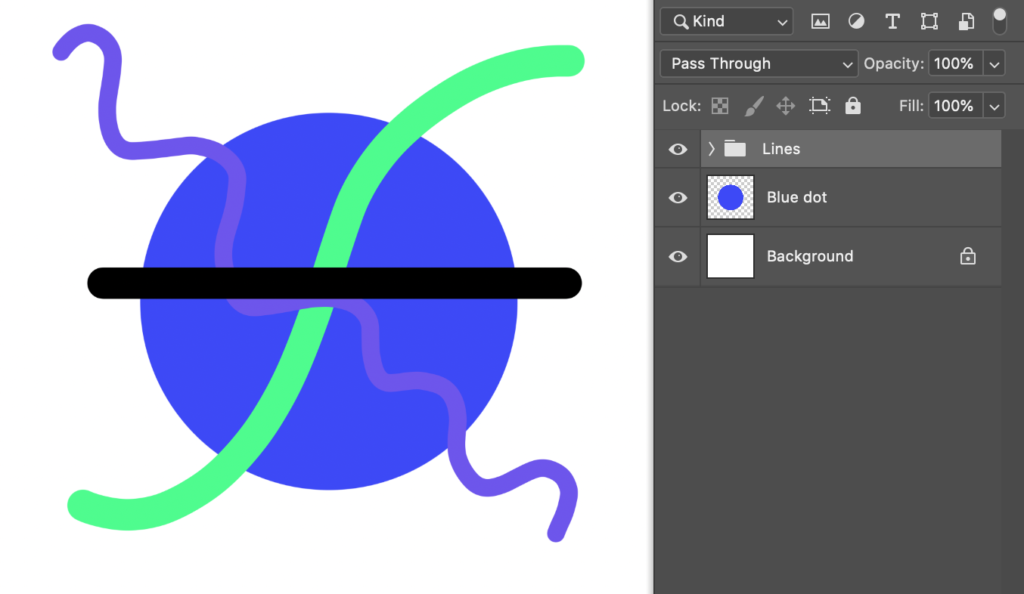
Layers can be named and grouped under a specific folder. Naming is an essential part of a smooth workflow in photo editing, so it is a good idea to make it a habit from the start of your designing career.
In addition to naming, layers can be grouped. In the example below, all lines are moved to their own folder ”Lines”. Lines can still be arranged differently on top of each other within a folder, but the folder itself works in a layer structure in the same way as a single layer.
In the example below, the Lines folder is above the blue ball and therefore the lines appear on top. If the Lines folder were below the ball, the ball would appear at the top, respectively. For example, in an architectural image collage trees in the background and trees in the foreground should be put in their own folders.
In addition to grouping, layers can be combined. To merge multiple layers into a single layer, select the layers first and then the merge layers command. Merging layers retain the opacity of the various elements as they were in the original layers.
However, blending modes of different layers do not retain if the layers are merged. In other words, if you combine a layer with a Normal blending mode and a layer with a Color burn layer mode that forms some kind of effect when you combine these layers, the Color burn blending mode changes to a Normal blending mode, and the effect disappears.
Layer Locks
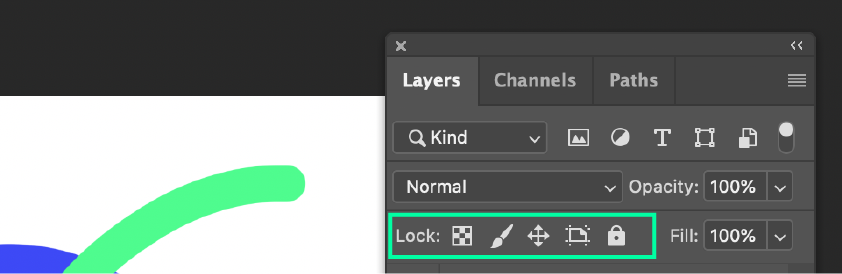
Another thing that is essential in layers is that they can be locked in several ways. The most common of the layer locks is a lock, which prevents changes from being made to that layer. Other layer locks include locking the location of the element and transparent pixels, which is especially handy in illustrations, such as controlling shadows and color areas. The styles of the different lock types are displayed by hovering the mouse over the lock when the description of the lock will appear. Locks can always be added and removed.
In the layers window, on the left side of the layer, there is also an eye, which makes layers visible and invisible. The eye makes it easier to check what content-specific layers hold.
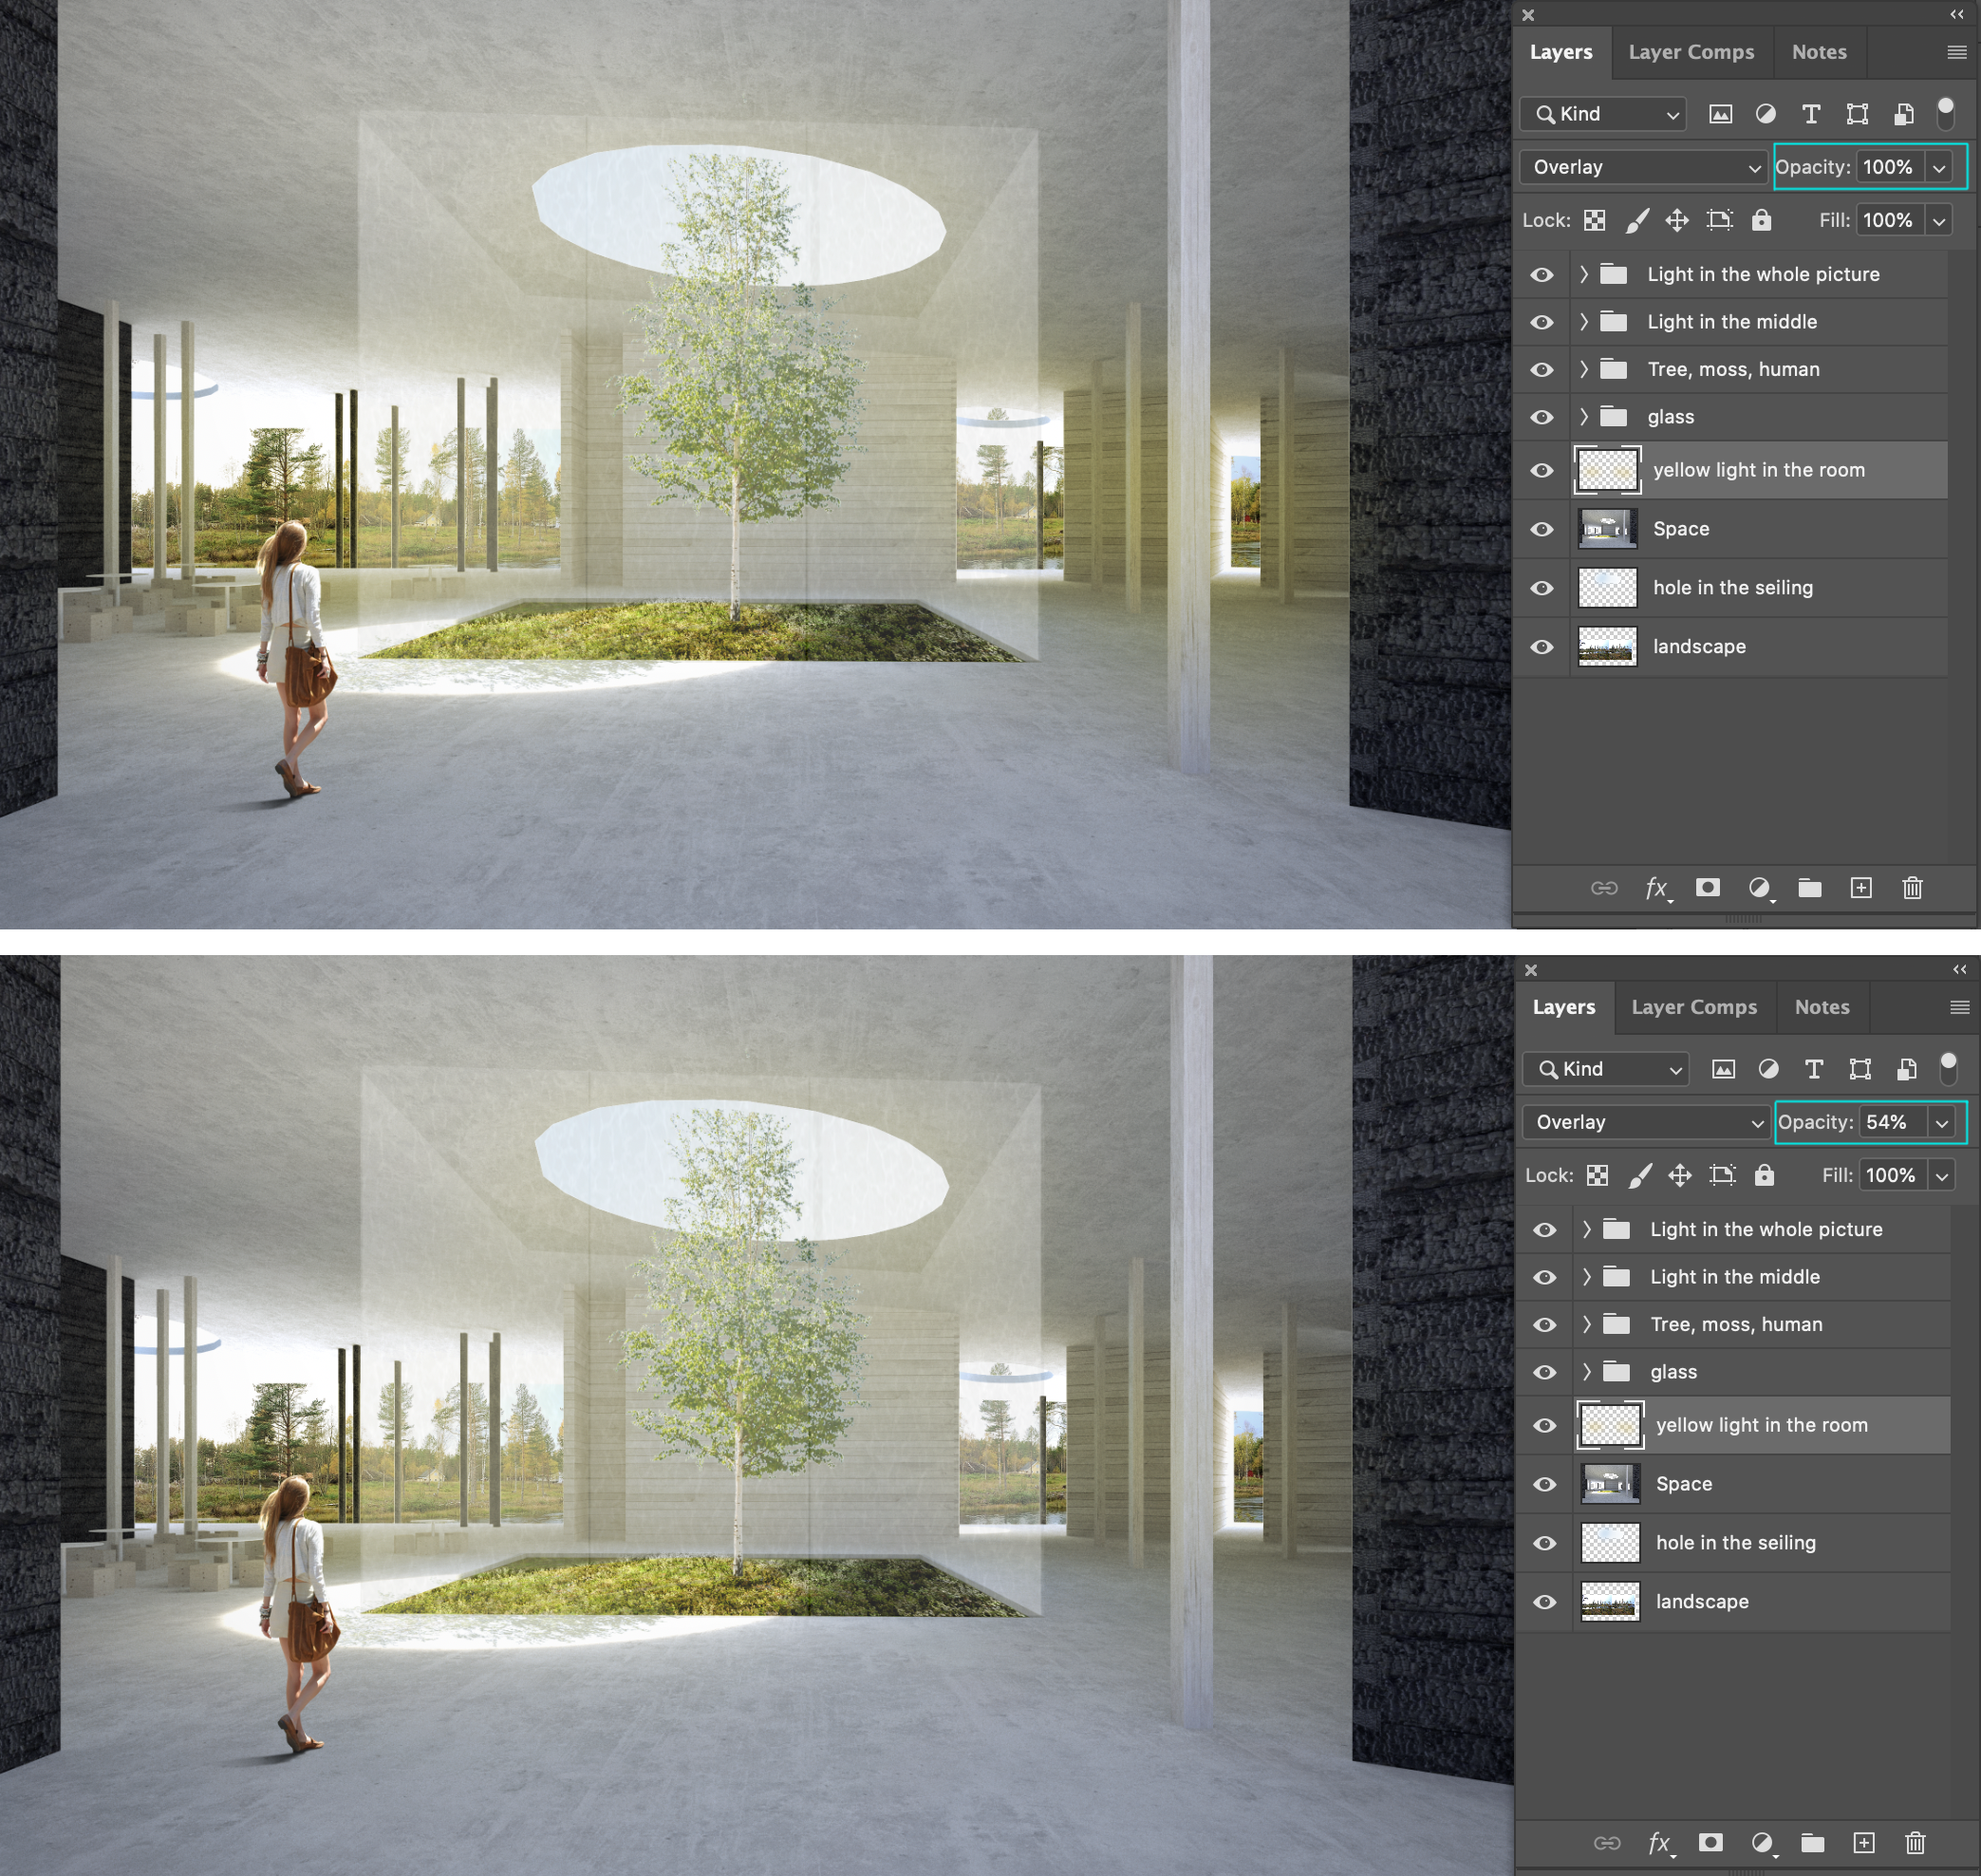
Layer Opacity
Each element opened in a photo editing software has its own defined transparency aka opacity. If you combine one new element in a previously opened image, that element has its own opacity, which is always 100% before editing, ie not transparent at all.
Also when painting with brushes, the opacity of the color can be changed to more transparent, which is typical if the photo is edited by adding light, shadow, or other transparent elements. In addition to adjusting each element’s opacity, you can also define the opacity for the entire layer. By modifying the opacity of a layer, changes can be made easily by adding and removing opacity.
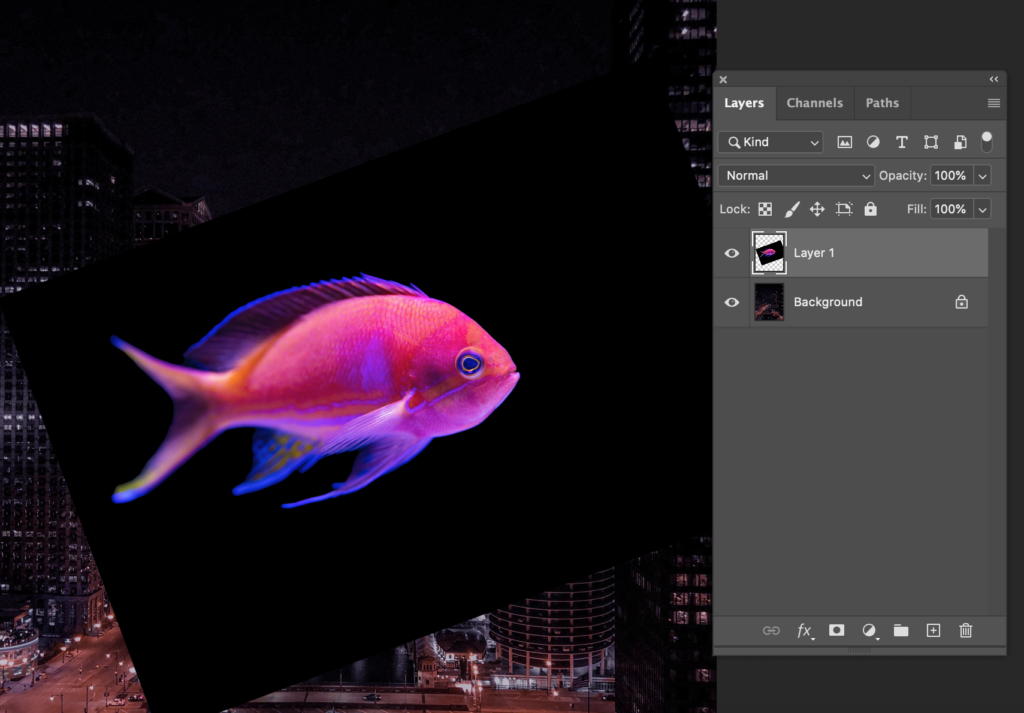
Original photo: Anna Pekkarinen, Hannu Rytky
Blend Modes
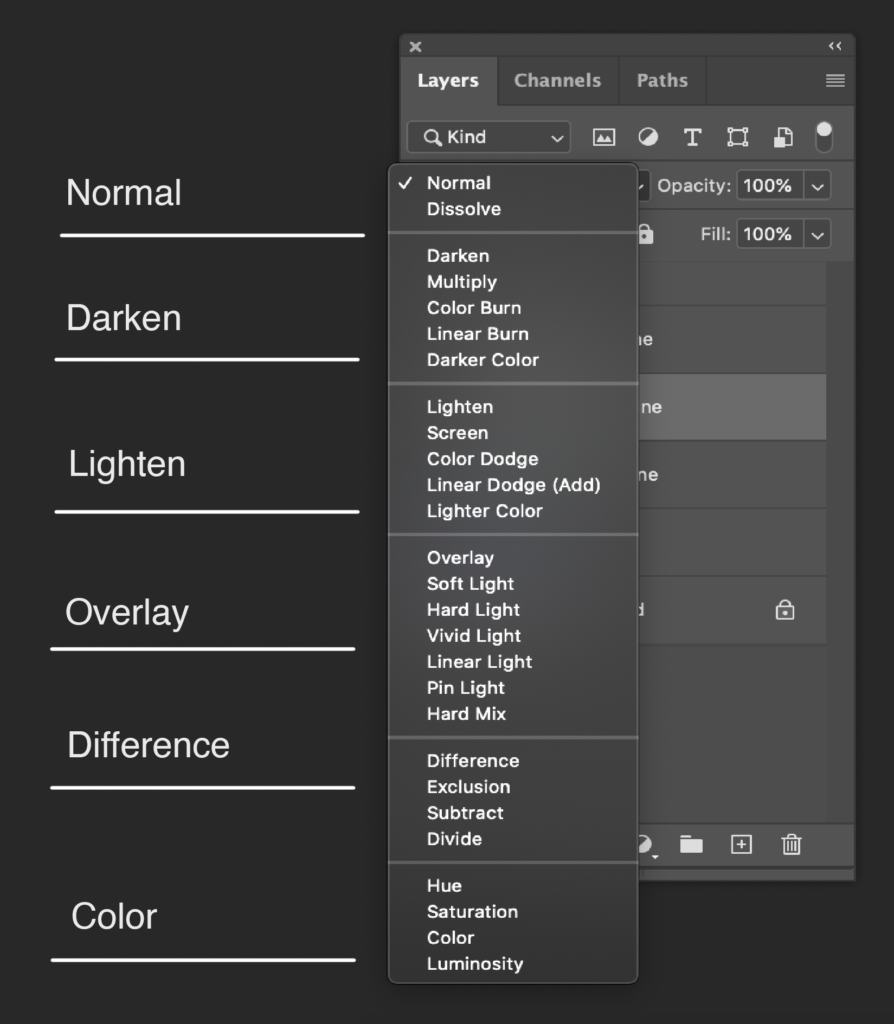
Interaction or blending between layers can be customized in many ways, in layer Blend mode settings. Blend mode adjusts the pixels of two or more layers in a way that creates a new effect.
If the blending mode is set to default, normal and the opacity of the layer is 100%, the element is displayed as it is and at full opacity. Then pixels of the layer that is located on the top will not be mixed with other layers.
For example in Photoshop, there are a lot of different blending modes to choose from and that might feel confusing at first. Even though there are a lot of different blending modes, they can be divided into six different categories: normal, darken, lighten, overlay, difference, and color. The Blending mode group determines how the pixels blend into the lower layer. In the Normal blending mode, which is the default and the first setting for all layers, there will be no blending to other layers. The only way to blend is to lower the opacity of that layer. Categories after that, however, are different and will create a blend without having to lower the opacity. You can learn more about different blending with this Youtube video.
In addition to grouping, layers can be combined. To merge multiple layers into a single layer, select the layers first and then the merge layers command. Merging layers retain the opacity of the various elements as they were in the original layers. However, blending modes of different layers do not retain if the layers are merged. In other words, if you combine a layer with a Normal blending mode and a layer with a Color burn layer mode that forms some kind of effect when you combine these layers, the Color burn blending mode changes to a Normal blending mode, and the effect disappears.